
Create 3D models with Solid Edge - tutorial for beginners
Related Videos: Solid Edge Practice Tutorials for Beginners - 3 | Solid Edge Part Modeling Exercises Tutorial (May 2024).
Solid Edge is one of the most famous 3D modeling programs that is used almost everywhere. In this tutorial, we turn absolute solid-edge beginners into professionals and show you how you can use the program effectively to implement your own ideas. In total, we would like to create five different 3D models with you.
Create jack plug with Solid Edge
First of all we would like to design a protective cap for the headphone port of your smartphone. Start the "Solid Edge" program, click on "New" in the sidebar on the left and then click on "New" again.
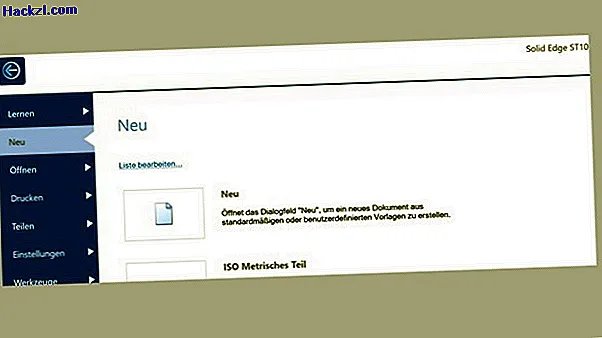
Now select "iso metric part.par" and click "OK".

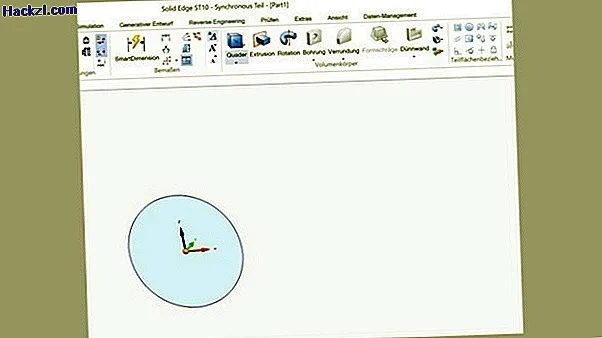
You can switch to the front view by clicking on "Front". Alternatively, you can change the view by pressing the middle mouse button.

Click the circle to create a new one.

Select the origin of the sketch as the center of the circle.

Dimension the circle with 7 mm. After this has been done, you can end the circle tool by pressing [ESC].

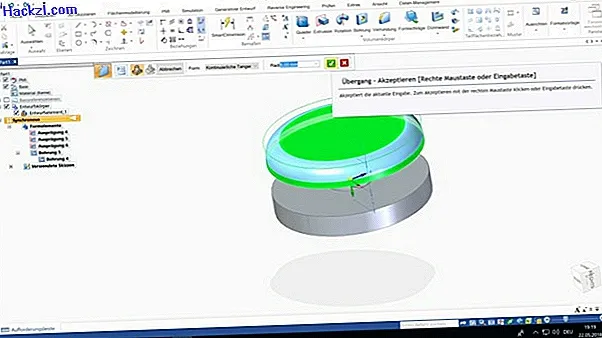
Click on "Extrusion" and select the circle. Alternatively, you can also click directly on the surface with the classic selection tool (→ [ESC]) and then on the extrusion arrow that appears.
Extrude the circle by 0.7 mm.

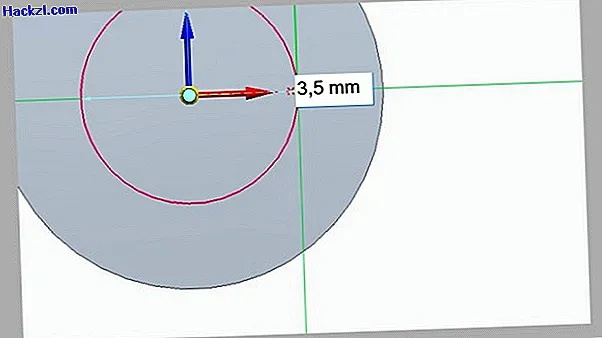
Construct another 3.5 mm diameter circle on the extruded surface.
Extrude this circle by 8.5 mm.

Construct another circle with a diameter of 3.2 mm.

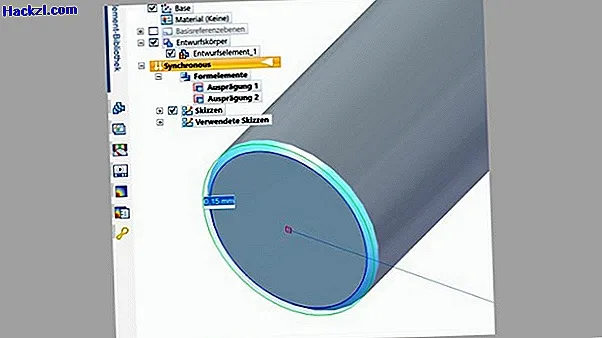
Then select "Chamfer (same chamfer lengths)".

Click on the larger of the two arcs and enter "0.15 mm".
Extrude the smaller circle by 1.5 mm.

Create another circle with a diameter of 3 mm and also extrude it by 3 mm.

Click "Draft".
First select the front circular area and then click on the jacket of the cylinder.

If necessary, click the arrow to reverse the direction. Then enter "4.76 °" and confirm with Return.

Create another chamfer, select the not yet rounded arc and enter 0.35 mm.

Construct a circle with a diameter of 1 mm and also extrude it by 1 mm.

Then set up a 45 ° draft.
You can create an engraving by pressing the text symbol.
Enter your initials here, choose a suitable font and size 2 mm.

Move the text with the mouse and click when you are satisfied with the selected position.

Extrude the text by 0.4 mm. Make sure that the extrusion is not applied as an attachment, but extruded inwards (as an engraving).

When you're done, click the Solid Edge logo in the top left and choose "Save As".

Select "STL documents" as the format.

Open the options, set the tolerance options to "Fine" and save the model.

Design fidget spinners
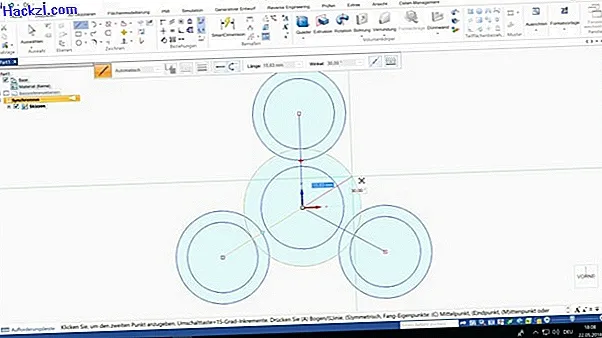
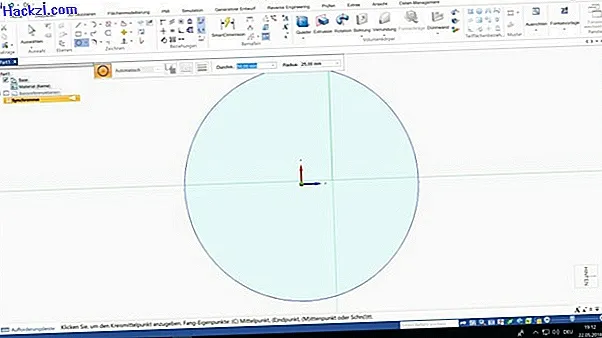
Now we want to create our own fidget spinner. To do this, first create a new sketch and a circle with a diameter of 22 mm.

Construct a 25 mm long line from the center of the circle.

Construct this line for -30 ° and -150 °.

Place circles with a diameter of 18.75 mm at the ends of the lines.
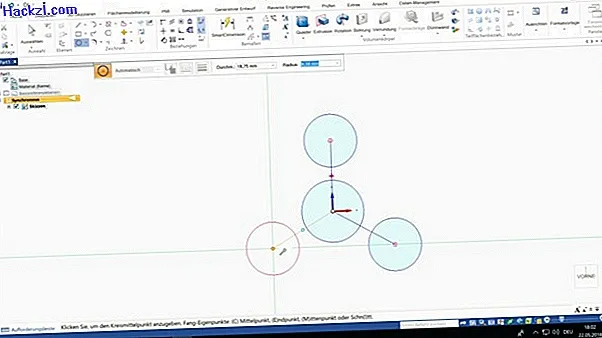
Place further circles with a diameter of 24.75 mm on these circles.

Create a circle from the center that runs to the outer circles (see picture).

From the origin, create lines that extend to the outer central arc and represent an extension of the existing lines.
Then select the "Tangent curve" tool.

First click on the end point of the extended lines and then on the periphery of the circle. Repeat this step for all pages. Make sure that you always use the same angle.

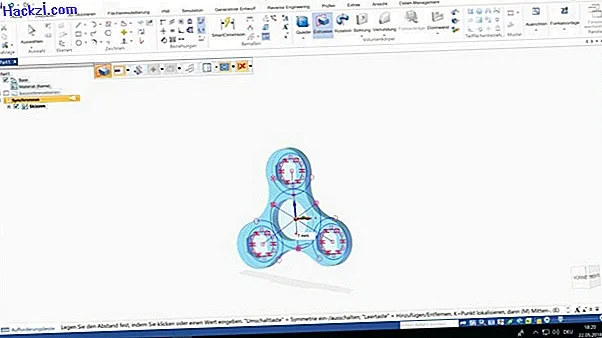
The next step is to draw a polygon.

Make sure to select "6.45 mm" as the distance. Place the polygon in all three outer circles.

While holding down the [CTRL] key, select all the surfaces to be extruded (see picture) and extrude them by 7 mm.
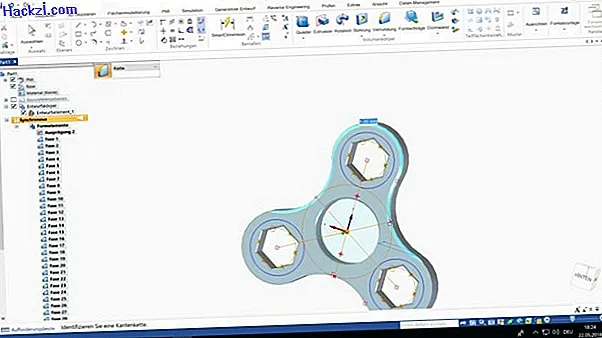
Set up bevels of 0.5 mm on all inner edges.

Set up chamfers of one millimeter on all outer edges. Finally save the model as an STL file.
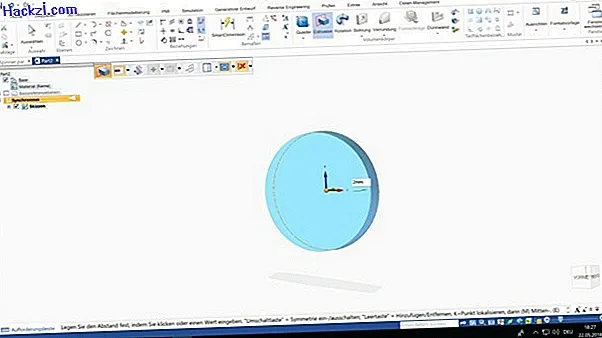
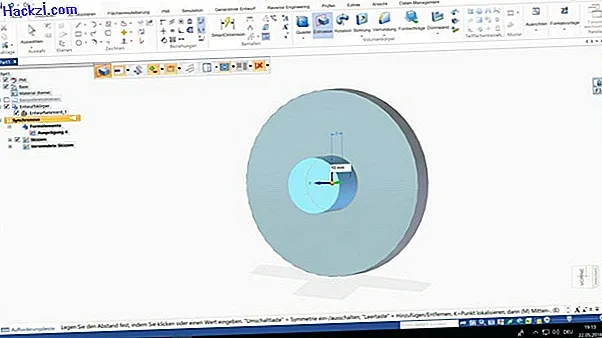
You will also need caps that are inserted into the ball bearing of the Fidget Spinner. To do this, construct a circle with a diameter of 2 cm.

Extrude it by 2 mm.
Create a circle with a diameter of 10 mm and extrude it by 0.5 mm.

Now construct a circle with a diameter of 8.1 mm.

Extrude it by 3 mm.

Finally, set up a draft of 2 ° and save the model as an STL file.
Create your own yo-yo
First create a circle with a diameter of 5 cm.
Extrude it by 7 mm.

Construct another circle with a diameter of 15 mm and extrude it by 10 mm.
Create another circle with a diameter of 5 cm on the extruded object and also extrude it by 7 mm.

Select the "Hole" tool.

Drill a hole in the center piece with even spacing on all sides.

Switch to the "Transition" tool.
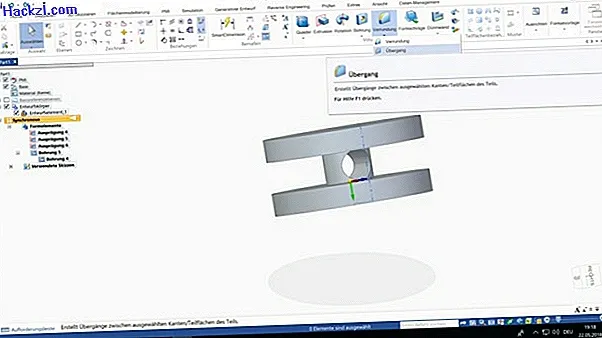
Click on "Transition" in the tool settings as well.

First select the circular area and then click on the outer surface of the cylinder. We use 5 mm as the transition radius. Do the step on both sides.
Finally, flatten the inner edges of the object with a 1 mm bevel and save it as an STL file.

Model your own smartphone stand
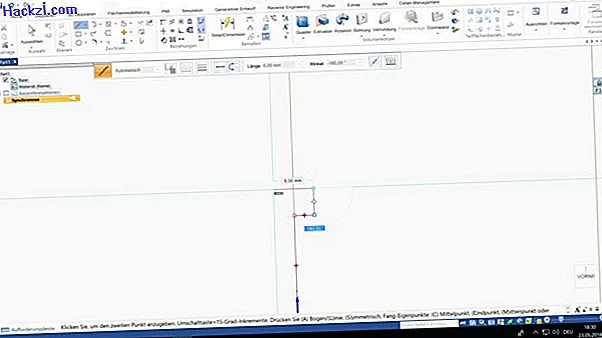
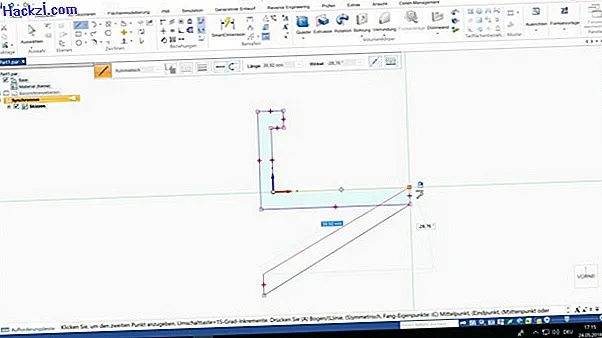
You have probably wanted to watch a film with your smartphone and have found that this is relatively uncomfortable. To remedy this problem, we are building our own smartphone stand. To do this, first sketch a line with a length of 15 mm.

Go 3 mm to the right from the end of the line.

Now go up 4 mm.

From the end point of the last line, draw a line that runs 6 mm to the left.
From there it goes down 23 mm.

Then construct a line that goes 35 mm to the right.

From there it goes up again 4 mm.

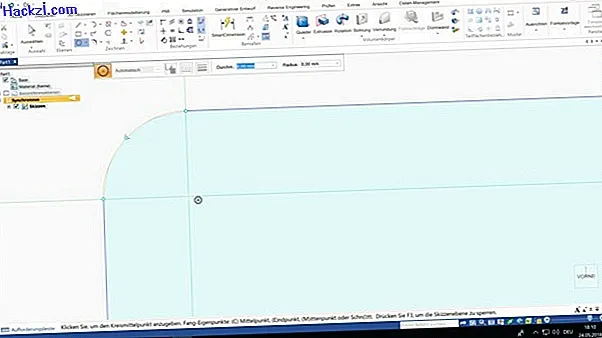
Finally connect the end point of the line to the origin.

Next you have to model the stand. To do this, draw a line at a 150 ° angle to the same height as the rest of the stand.

Now go up 5 mm here.

Connect the end point to the base as well.
Extrude the area by 12 mm.

Finally, make roundings of one millimeter on all (outer) edges and save the model as an STL file.

Design your own keychain
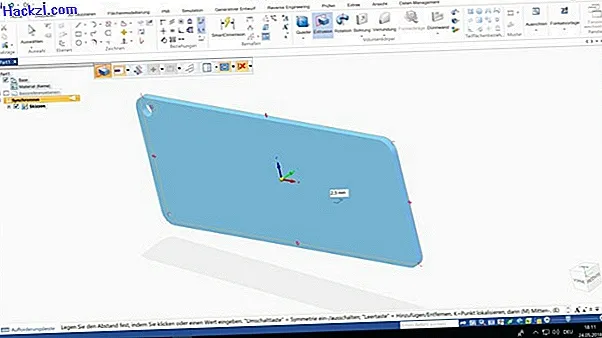
Finally, we would like to create your own keychain with you. To do this, draw a rectangle with the dimensions 50 ⋅ 20 mm.

Select the "Fillet" tool.

Round off all corners with a radius of 2 mm.

Sketch a circle in the top corner. The center should be at the intersection of the lines that pass through the end points of the fillet.
Choose a diameter of 2 mm.

Extrude the area by 2.5 mm.
Then select the "Text Profile" tool.

Write a word of your choice here, such as your name.
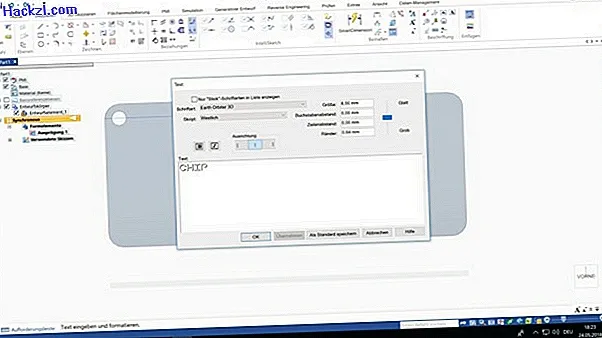
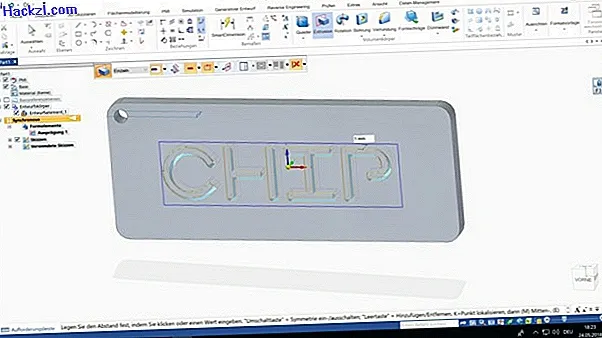
Place the profile on the keychain.

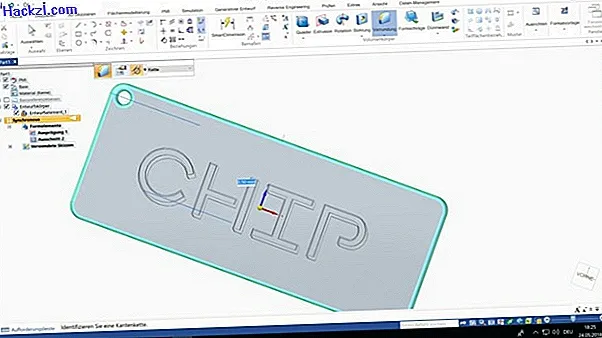
Extrude it backwards by one millimeter.
At the end add 0.5 mm fillets at all corners and save the model as an STL file.
In the next article, you will learn how to register in the vhs.cloud. We also give you a first introduction to the programming language "Java".