
Create 3D font with Gimp - how it works
With Gimp you can give your fonts a chic 3D effect. We'll show you how to do this with the image editing tool.
Gimp: Create 3D font in 10 steps
Whether on invitations, handouts or your own website - 3D text is a great eye-catcher almost everywhere. You can understand the complicated steps of the instructions with Gimp again in our picture gallery.
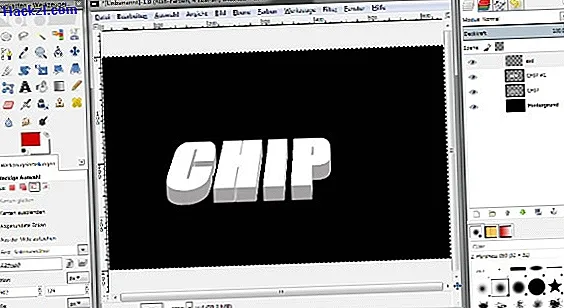
- Open a new drawing area in Gimp and enter the desired lettering using the text tool. It is best to use a light font on a dark background.
- Then select the Perspective tool and tilt your text back a little. As soon as you like the result, click on "Transform".
- Right-click on the text layer and look for the entry "Duplicate layer". Click the eye icon on the new layer to hide it.
- Now it's back to the original text level: Right-click on the entry and select the option "Selection from alpha channel".
- Now give the text a slightly darker color. You can do this either with the fill tool or with "Colors"> "Colorize".
- Then cancel the selection again via "Selection"> "Nothing".
- Right-click the text layer again and select the "Layer to Image Size" option.
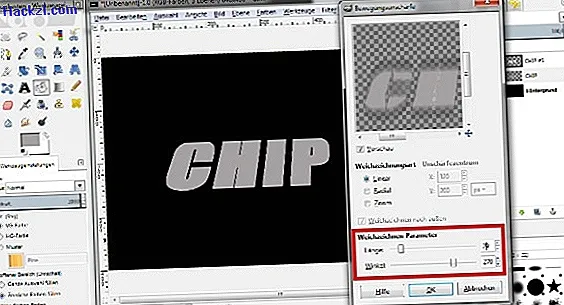
- Under "Filters"> "Blur" you choose the entry "Motion blur". Set the slider for "Length" to "27" and for "Angle" to "270". Then click on "Ok".
- Now copy the text layer to your clipboard using the key combination [Ctrl] + [C]. Then press the key combination [Ctrl] + [V] 30 to 40 times to insert the layer again. The font should slowly take on a 3D effect.
- Finally, activate the eye symbol on the previously hidden layer. The 3D effect is now finished.
We will clearly show you all the steps in our picture gallery.
Latest videos
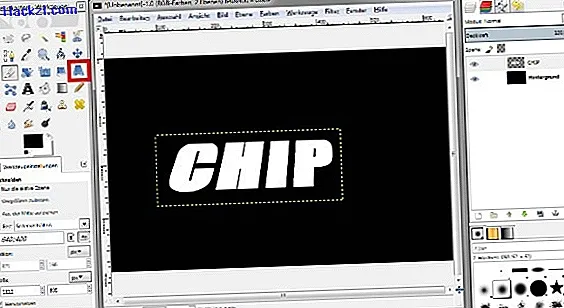
You can tilt your text backwards using the perspective tool. Play around with the settings here until you are happy with the perspective.
After you have duplicated and colored the text layer, apply the "Motion blur" filter. The correct values for length and angle are important here.
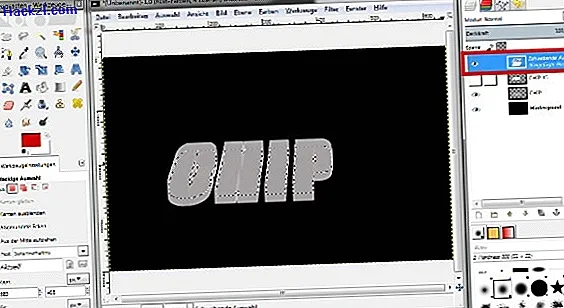
Then duplicate the layer up to 40 times. The quickest way to do this is to use the key combination [Ctrl] + [C] and then [Ctrl] + [V]. The more you insert the layer, the better the 3D effect should look.
Finally, show the first layer copy again. Your 3D text is now ready and you can save it or copy it to another image.
