
Create a list of abbreviations in Word
A list of abbreviations is often required in scientific work. You can read how to create one in Word in this practical tip.
Word: Create a list of abbreviations
First of all you have to add all abbreviations in your text to the index.
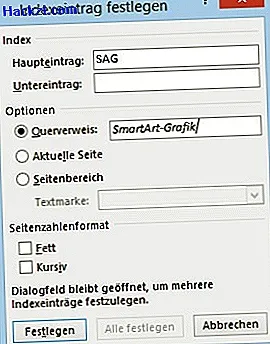
- Select an abbreviation and press the key combination [Alt] + [Shift] + [X].
- Your shortcut is now the main entry in the small window. Select "Cross Reference" and type in the full meaning of the abbreviation in the field.
- Click "Set". A line now appears in curly brackets behind the abbreviation in the text, but this will no longer be visible in the print version or in a PDF.
- The index window is still open. You can now mark the other abbreviations one after the other and define their meaning as in steps 2 and 3.
- When you have added all abbreviations to the index, you can end the process by clicking on "Close".
Word: Insert index with abbreviations
Now you have to insert your abbreviation index in one place in your document.
- Use the cursor to navigate to the position in the document where you want to insert the index. If you want to insert it on a separate page at the end of the text, place the cursor behind the end of the text and then click on "Page break" under "Insert".
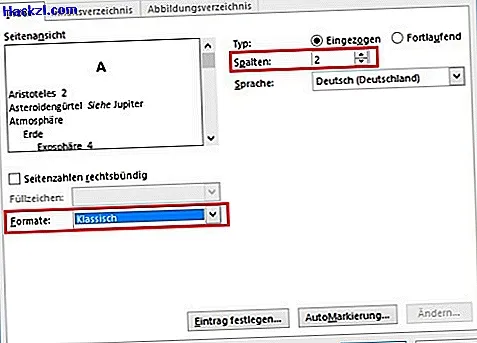
- Now click on "Insert Index" in the "References" menu.
- Choose how many columns you want your index to have and choose a format from the list.
- Click "OK" to insert the index.
- You can add entries to the index later by repeating the steps in the first section.
This practical tip refers to Word 2013. In other versions, the menu navigation may differ, but the steps remain the same. In the next article, you will read how to use Word on the iPad.