
Android Studio: Create your own app - Here's how
With the development environment Android Studio from Google you can develop your own apps. We explain how to do this in the practical tip below.
Download and install Android Studio
- Before you can develop your first Android app, you need to download and install the Android Studio development environment.
Android Studio: Set up a project
After you download and install Android Studio, the Android welcome screen opens. Here you have to set up your new project:
- First click on "Start New Android Studio Project".
- Now define the name of your app and the storage location and click on "Next".
- Next, set the target environment for your app. This can be a phone / tablet, Android Wear or an Android TV.
- In this example "Phone / Tablet" is selected as the target environment.
- Next, set the minimum version of the supported operating system. The higher you choose this version, the more functions are available.
- Now click on "Blank Activity", then on "Next" and finally on "Finish".

Android Studio: Create app layout
After a somewhat longer loading time in which your project is created, the programming environment of Android Studio opens. Here you can first define the layout of your app.
- First click on "Project" on the left.
- Then select the item "app", "res" and then "layout" and open the file "content_main.xml" with a double click.
- An editor opens by dragging buttons and text fields from the "Palette" field to your user interface. Labeling with XML is also possible.
- On the right under "Component Tree" you can select the individual components of your user interface and define a unique ID for them. Text and layout can also be adjusted here.

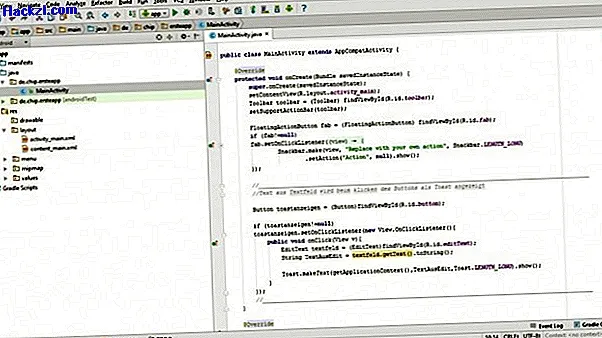
Android Studio: write program code
Once you have customized your layout, you need to write the program code. This is the logic behind your app:
- To do this, go to "app", "java", the name of your app and then to MainActivity under "Project".
- Here you can now write the logic of your app in the Java programming language. To learn this programming language, the book "Java is just an island" is particularly suitable.
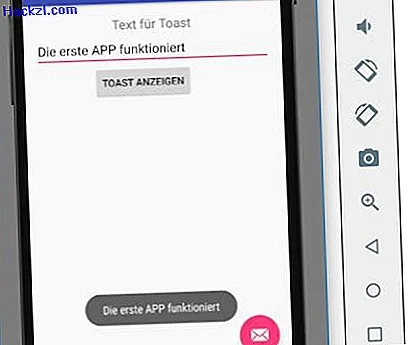
- In the example code in the screenshot, the text is read from the text field when you click the button and then displayed as a notification at the bottom of the app.
Android Studio: Start the app in the emulator
To test your app, you need to start an emulator and install the app on it:
- After you have finished programming, you must press [Shift] + [F10]. This will compile your app and load it onto the emulator.
- A window opens in which you select the emulator under "Launch Emulator".
- If you have not yet set one up, click on the three dots to the right of "Launch Emulator" and then on "Create Device". Follow the instructions to set up the emulator.
- As soon as the emulator has started up, the app is automatically installed and started.
In our next article, you will learn how to bring your app to your mobile phone in the form of an APK file.