
Arduino projects: the 3 coolest projects for beginners
Arduino beginners can also make extensive use of the Raspberry alternative. We present the best projects for every hobby developer in this article.
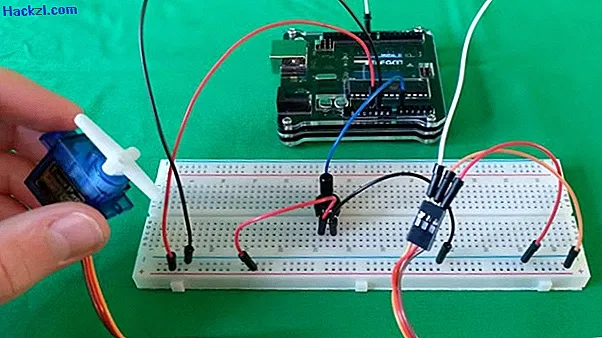
Arduino project: control servo motor with potentiometer
In addition to your Arduino, this project also requires a servo motor and a potentiometer.
- Connect the servo to the ground, a 5V pin and a pin that supports pulse width modulation.
- The potentiometer is also connected to 5V and ground, but also to an analog input.
- The analog value of the potentiometer is read out again and again in the code. Using a map method, the value between 0 and 1023 is assigned an integer value between 0 and 180, which represents the later number of degrees of the servo. For testing, you can copy the following code into your development environment.
- #include servo myservo; int pot = 0; int value; void setup () {myservo.attach (9); } void loop () {value = analogRead (pot); value = map (value, 0, 1023, 0, 180); myservo.write (value); delay (15); }
Arduino: control LED row with potentiometer
A potentiometer is connected similar to the project above.
- In addition, you need to connect some LEDs to the Arduino. Depending on the value reached by the potentiometer, the LEDs are switched on or off in succession.
- Again, you can copy our sample code and adapt it to your needs:
- int value_pot; int value_LED; void setup () {pinMode (A0, INPUT); pinMode (8, OUTPUT); pinMode (9, OUTPUT); pinMode (10, OUTPUT); pinMode (11, OUTPUT); pinMode (12, OUTPUT); pinMode (13, OUTPUT); } void loop () {value_pot = analogRead (A0); value_LED = map (value_pot, 0, 1023, 0, 6); if (value_LED> 0) {digitalWrite (8, HIGH); } else {digitalWrite (8, LOW); } if (value_LED> 1) {digitalWrite (9, HIGH); } else {digitalWrite (9, LOW); } if (value_LED> 2) {digitalWrite (10, HIGH); } else {digitalWrite (10, LOW); } if (value_LED> 3) {digitalWrite (11, HIGH); } else {digitalWrite (11, LOW); } if (value_LED> 4) {digitalWrite (12, HIGH); } else {digitalWrite (12, LOW); } if (value_LED> 5) {digitalWrite (13, HIGH); } else {digitalWrite (13, LOW); }}
Multiplayer project: Arduino game for two players
Finally, we would like to show you how you can build a two-player reaction game.
- For this we use two buttons, which are connected to pins 7 and 8, and an LED (at pin 8) as an output.
- First of all, the LED is activated after up to 5 seconds. Who then was quicker to press is shown in the serial monitor.
- You can find a sample code here:
- void setup () {Serial.begin (9600); pinMode (2, OUTPUT); pinMode (7, INPUT); // Buzzer pinMode (8, INPUT); // Buzzer delay (random (0, 5000)); digitalWrite (2, HIGH); } void loop () {if (digitalRead (7) == 1) {Serial.println ("Button 1:" + String (millis ())); } else if (digitalRead (8) == 1) {Serial.println ("Button 2:" + String (millis ())); } else {}}
In the next practical tip, you will learn how to build a resistance measuring device with the Arduino.