Arduino: build voltmeters - how it works
There is almost nothing you cannot build with the Arduino. In this article, we reveal how to create a voltmeter yourself.
Arduino: build voltmeters - how it works
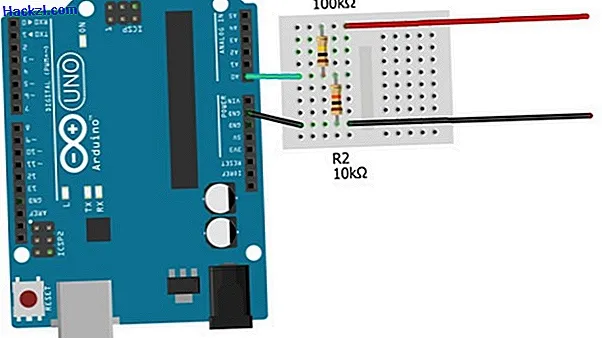
- The parts of a voltmeter are relatively manageable: you need an Arduino, a breadboard, a 100kΩ and a 10kΩ resistor and some jumper cables.
- Connect the cables and resistors as shown in the picture.
Program the Arduino voltmeter
If everything is connected correctly, you can start programming the voltmeter. You can find the complete code for copying in our picture gallery.
- First, the commands "float vp = 4.7;", "float r1 = 100000;" and "float r2 = 10000;" created three variables. The variables r1 and r2 stand for the two resistors. The variable vp is the voltage that the Arduino receives via the USB cable. For security reasons, this is slightly less than 5V.
- Then with the command "Serial.print ((int) (vp / (r2 / (r1 + r2))));" the maximum voltage output in the serial monitor.
- Now with the commands "float v = (analogRead (0) * vp) / 1024.0;" and "float v2 = v / (r2 / (r1 + r2));" the voltage on the free jumper cables is calculated. If you want, you can do this with the command "Serial.println (v2);" can also be output in the serial monitor.