
Atom: Synchronize editor settings - how it works
If you use the Atom editor on multiple devices, you can synchronize your packages and settings. For example, you can work on your projects without restrictions at work and at home. In this practical tip, we explain how to set up Atom for this.
Atom: Synchronize editor settings and packages - you need that
With the solution presented here, your Atom settings are synchronized with a Git repository. With each start, the editor then automatically searches for changes and updates your local setup. You need the following things:
- As a basis you need the Atom editor.
- You also need the sync-settings package.
- To synchronize your settings you also need an account on Github.com.
Step 1: Synchronize Atom settings - configure Github.com account
In order to be able to share your settings with other devices, they are first uploaded to Github. You need an account for this. In another practical tip, we will show you all the basics in the Github tutorial.
- First log in to Github.com or create an account.
- Then create a personal access token under the following link. You can freely choose a name for the description, for example "Atom Synchronization".
- Important: You have to tick "gist - Create gists" below. This will allow Atom to access the repository later.
- Then confirm with the "Generate Token" button.
- On the next page, your new access token is highlighted in green and can be seen in plain text. Leave this page open or copy the token. Otherwise, you won't be able to access it later.

Now you need to set up a repository. In this case you need a so-called "gist".
- Create a new gist using the following link (in another tab).
- Write "packages.json" in the field with the text "Filename including extension ...".
- In the large text field write any text like "test". This will later be overwritten by Atom anyway. You still have to put some text first.
- The information in the repository will later be publicly uploaded to Github. With a secret gist, however, search engines cannot find your settings. In addition, other users can only find your gist if you have sent them the link yourself. So it's best to confirm your gist with "Create Secret Gist".
- You are now on the page of your repository. You will find the Gist-ID in the address line of your browser. This is at the end of the address and begins after the last "/". Again, either leave the page open or copy the ID for later. In step 2 you need the Gist-ID together with the access token from step 1.

Step 2: Set up Atom Package sync-settings
Now that you've created a repository, all you have to do is install and set up the package.
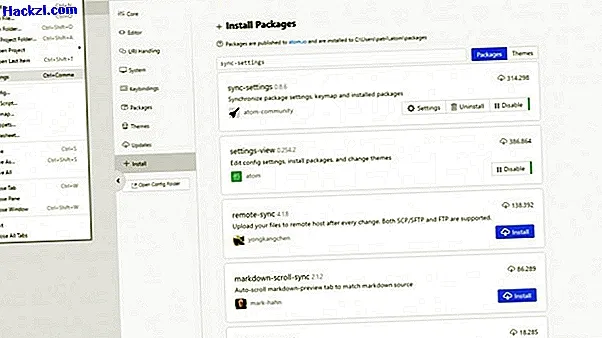
- First you have to download the package. To do this, click on "Settings" in the menu above under "File".
- Enter "sync-settings" in the "+ Install" tab and confirm with the Enter key. When you have found the package, you can download it using the blue "Install" button.
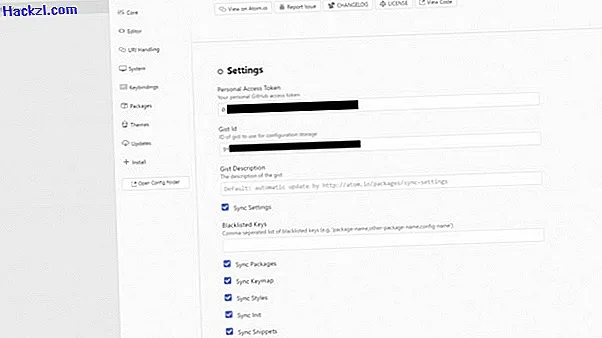
- Now click on "Settings" in the entry of the package.
- In the "Person Access Token" and "Gist Id" options, copy the two combinations from steps 1 and 2 into the text fields. You can make further settings below. First you should try the package with the standard settings.
Step 3: Synchronize the Atom settings
When you have completed steps 1 and 2, you can synchronize your settings. You have to manually instruct the package to make a backup. On other devices, this data will be downloaded automatically the next time you start it.
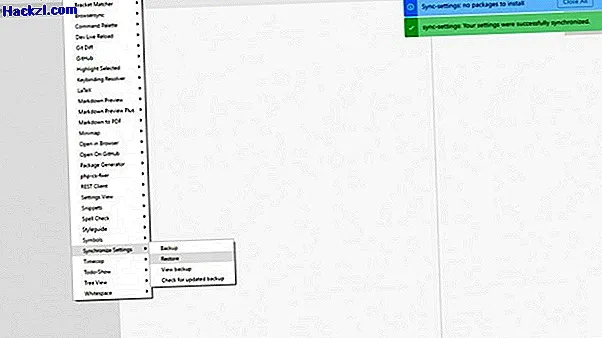
- If you have not yet created a backup on any other device, you have to do this yourself once. To do this, click on "Packages" in the menu above. There you will find the entry "Synchronize Settings". Right next to it click on "Backup". Your data was then transferred to your repository on Github.com. At the top right a window opens with the content "sync-settings: Your settings were successfully synchronized."
- You can then call up your settings on another device or during a new installation. Proceed exactly as described in steps 1 and 2. If you have already created a backup once, the package automatically retrieves all data. Otherwise you can start the process manually by clicking on "Restore".
- Of course, you can also synchronize future settings. This is necessary if, for example, you have installed a new package and want to transfer this change to other devices. Simply click on "Backup" again. Your old data will then be overwritten with the new one.
You can not only use Github for your Atom settings. In further practical tips, we explain everything about the commands Git: Clone and Git: Pull.