Remove dark circles with Photoshop - Here's how
If you weren't really fit at the last snapshot, you can remove unsightly dark circles with the help of Photoshop. Here we show you how easy it is to let fatigue disappear from a photo.
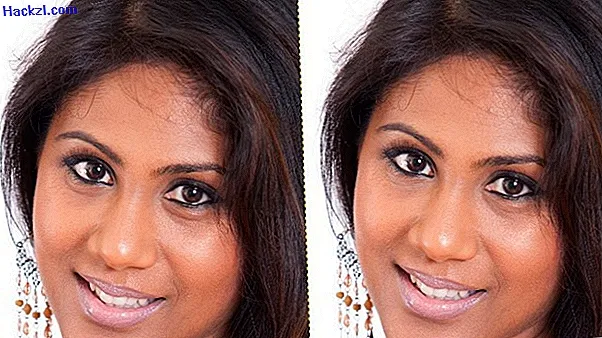
Easily remove dark circles with Photoshop
The night was long, and unfortunately you can see that in the photos: Dark circles under the eyes give the portrait photo a tired look. With the photo editing software Photoshop it is easy to retouch dark circles. The result is a fresher and more radiant face.
- Open the image in Photoshop and first create a copy of the layer with the key combination [CTRL] + [J]. So you not only have a before-after comparison, but also a backup if the retouching goes wrong.
- The easiest and fastest way to retouch dark circles is via the copy stamp. You can find it in the toolbar.
- If the copy stamp is activated, look for a flat, bright area of the face. Hold down the [ALT] key on this area. If the cursor changes briefly into a crosshair, you have recorded the color range. It is advisable to choose an area just below the eye, because the brightness there best suits the retouching of the dark circles.
- To achieve a natural result, set the stamp's opacity to around 20 percent. Change the mode from "Normal" to "Lighten".
- Now move your mouse button over the dark areas of the dark circles. The smaller you set the diameter, the more you have to correct, but the result will be better and more detailed.
- Once you are satisfied with the brightening result, check if there are any angular transitions anywhere. You can remove them with a soft eraser. If you worked cleanly, the unsightly dark circles disappeared.