Create photo frames with Photoshop: A guide
Related Videos: Testing the NEW Frame Tool (vs Clipping Masks) | Photoshop CC 2019 (May 2024).
Use this guide to create a photo frame in Photoshop. We explain step by step how you can beautify your pictures.
Send photo frames
Photoshop does not offer photo frames itself, so you have to create them yourself. You get an appealing picture frame by some filters.
- First open the picture you want to frame. Click on "File", "Open" and then choose the image you want. Now load it using the "Open" button.
- Now click on the "Selection Rectangle Tool" in the toolbar on the left and mark an area in your image. This is the area that will not be changed later.
- Now right-click in the marked area and select "Invert selection". Now the area should be marked, which then results in the frame.
- Then go to "Filters" at the top of the menu, then "Blur Filters" and "Gaussian Blur". A window opens in which you can specify how the frame should be blurred. You can see the changes immediately in the picture. Confirm your selection with "OK".
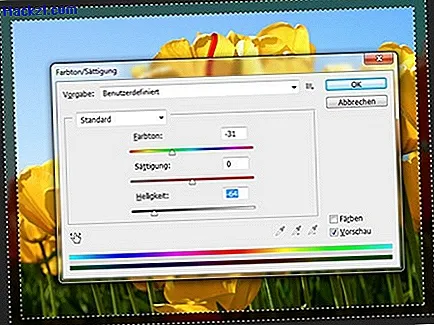
- If you now press the key combination CTRL + U on your keyboard, the window for hue and saturation opens. You can also vary the brightness of the frame here. Depending on how your picture looks, you can adjust different values here, it is recommended to reduce the brightness in any case. If you are satisfied with the result, click on "OK".

These instructions were carried out on a Windows 7 PC with Photoshop CS6. For other versions, the process can vary slightly.
Latest videos
Use the "Selection Rectangle Tool" to select the area that should remain unchanged.

Invert the selection to mark the frame later.

With the "Gaussian blur" you determine how out of focus the picture frame should be.

Now use CTRL + U to determine the further appearance of the frame.