
Dramatic clouds in Lightroom - how it works
Related Videos: Lightroom Tips - Clarity Brush - create dramatic clouds (May 2024).
Lightroom is an ideal tool if you want to edit pictures quickly and professionally. You can also easily create dramatic clouds with our tips.
Photographing clouds: you should note that
Without the right picture, the best editing is worthless. You should therefore consider a few aspects:
- Make your shot in RAW format. This gives you much more scope when editing in Lightroom.
- Take pictures when the sky actually looks dramatic. Often you can take the best pictures in the rain or even thunderstorm.
- Pay attention to a straight horizon and apply the rule of thirds. The picture is particularly harmonious.
- Take the photo with the lowest possible focal length. In this way, a larger part of the sky is depicted and the effect is enhanced.
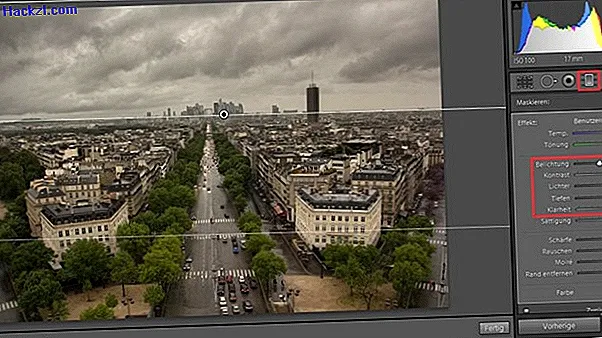
Edit dark clouds in Adobe Lightroom
- Now load your image into Lightroom in development mode.
- Switch to the Gradient Filter tool. To do this, you can simply press the [M] key.
- Drag a gradient from above over the image. The middle auxiliary line should coincide with the horizon line.
- Increase the Contrast and Clarity values. You can pull the "Exposure" slider down a little.
- Experiment with the settings until you are satisfied with the result. Tip: Be careful not to lower the exposure too far. Otherwise, the photo quickly looks unrealistic.
This guide applies to Lightroom 4.4 on Windows 8.1. In further practical tips, we show how you can optimally photograph a skyline or a sunset.