
Create labels for mail merge - how it works
Related Videos: How to Mail Merge Address Labels - Office 365 (May 2024).
Mail merge can save you a lot of time in Word. If you send letters, invitations or anything else, you will appreciate the mail merge. Our instructions show you exactly how to proceed.
Mail Merge for Labels in Word Instructions
Almost all Office packages offer you the function of mail merge - from Word to OpenOffice. How you proceed exactly is very similar for the individual programs. We show the individual steps for a mail merge using the example of Microsoft Office 2016.
- Before you can use the mail merge for the labels, you have to do some preparatory work: you have to create the addresses for your mail merge in an Excel database. In the database, you continuously record the relevant addresses of customers, friends or suppliers in one line.
- Each element gets its own cell: A1 = first name, A2 = last name, A3 = street + house number, A4 = postcode, A5 = city.
- Make sure that the database is strategically sensible from the outset. The more skillfully you plan the structure of the database, the more varied you can use it later. Similar to mailing lists, it makes sense to create Excel lists for certain groups.
- If in doubt, create a field more than one too few. This later gives you the opportunity to use the Excel database in a variety of ways. This applies to form letters as well as to form labels or small evaluations.
- Tip: If your database becomes a little larger, it may be worth creating a mask in Excel.
Output labels as mail merge in Word
Latest videos
Launch the Mail Merge Assistant

Mail merge: set the format of the labels

Mail merge of labels: Call up data source
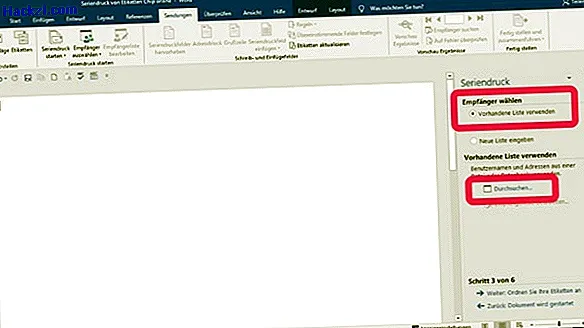
Mail merge labels: Select the Excel address database

Word offers you a mail merge wizard that will conveniently guide you through the process. Alternatively, you can of course call up the individual steps manually.
- To work with the Mail Merge Assistant, first go to the "Shipments" tab.
- In the ribbon, go to the "Start mail merge" area and click on the icon of the same name. In the pull-down menu you will find the "Mail Merge Assistant" at the bottom.
- As soon as you have called up the mail merge wizard, you will see the wizard menu on the right side of the screen. You just have to follow the individual steps very comfortably.
- First select the document type. In our case, the labels.
- Then click on "Change document layout" and then on "Label option". In the "Set up labels" menu, select your label type.
- After you have set the appropriate label format, select your data source in the next step. This is the created Excel address database. Alternatively, you can also use your Access database.
- Basically, you're almost done now. All you have to do is specify which data fields should be included on your mail merge labels.
- Finally, arrange the data fields as you want them to be printed later. Everything fits, start mail merge.
By the way, the creation of form letters in Word is just as easy as the mail merge for labels.