
How Spybot works: Instructions
To protect your computer from spyware and adware, Spybot offers an ideal solution. With these instructions you will get to know the program and how to use it correctly.
Get started with Spybot
After you've downloaded and installed SpyBot - Search & Destroy, you're good to go.
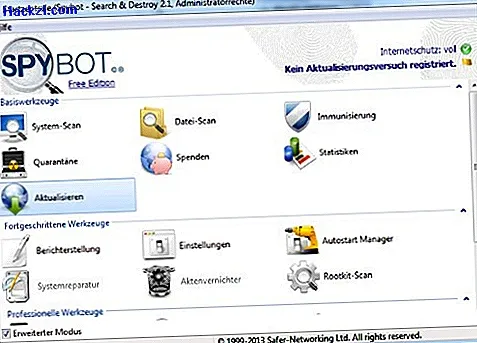
- On the home screen you will see all basic tools. If you activate the "extended mode" at the bottom right of the window, additional tools and functions are displayed. We will explain these to you in more detail below. Those that are slightly transparent can not be used in the free version.
- The first thing you should do is update the program, as new virus signatures are always available. To do this, click the "Refresh" button in the start window and then click the "Refresh" button again. This process can now take up to a minute. When this is complete, you can close the window again.
- Before we use the program properly and detect any spyware and adware, let's take a quick look at the settings. Read on in the next paragraph.
Adjust settings in Spybot
To configure this, activate the "advanced mode" below and select the "Settings" item. We present the most important setting areas to you here:
- System Services: Here you can determine whether the individual services of Spybot should be activated every time the computer is started. You can also start and stop these manually here.
- System integration: Here you can integrate certain functions into your system or remove them again. If you want to remove the functions set by Spybot from the context menu, you can do this with a simple click on the "Uninstall" button.
- Browser: Under this point you can select and deselect certain browsers that Spybot should not scan and clean. After cleaning your browser from Spybot, cookies, the history and the cache are deleted.
- Spybot is now ready for use.

Spybot: system scan and file scan
These two types of scans work relatively similarly. With the first you check the whole system, with the second only a certain folder or a certain file that seems suspicious to you.
- The first thing to do is to scan your computer for a system. To do this, open the tool of the same name on the start page. A new window is opening up.
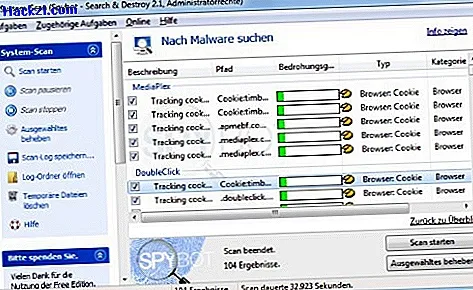
- If you click the "Start Scan" button above, your entire system will be checked for spyware and adware. This process can take 10 to 60 minutes, depending on the space used on your hard drive and the speed of your computer.
- When the scan is complete, click the button you used to start the scan again. However, this now bears the label "Show scan results".
- Here you get an overview of all identified dangers. These include not only the name and origin, but also the type and degree of threat. If you do not want to delete some of the findings, you can deselect them on the left. If you then click the "Fix selected" button, the files will be removed.
- So that you don't have to do a complete scan of your system every week, you only have the option to delete your "signs of wear". To do this, click on the arrow next to the "Start scan" button and select the "Scan signs of wear" item. This means that only your internet activities are searched and deleted.
Spybot: immunize the PC
The PC is supposed to be permanently protected against spyware and adware through immunization. If this is carried out, Spybot adjusts settings on your browser and your system so that unwanted software should no longer get onto your computer.
- Open the "Immunization" tool and click on "Check system" at the top right of the window to run a scan.
- When this is complete, click on the "Immunize" button. This process can take some time.
- If errors occur later, you can undo them in the menu on the left.
Autostart manager and rootkit scan
- Autostart Manager: This function is really only intended for advanced users. Here you can not only edit autostart entries, but also make many other settings in the registry. You should only use this function if you really know what you are doing.
- Rootkit scan: However, you can use the rootkit scan without hesitation. If you press the "Deep Scan" button, you can also check your system for deeper rootkits.
This practical tip was carried out with version 2.1.21 under Windows 7. What you can do if SpyBot displays the error message "ws2_32.dll missing" in this practical tip.