
GIMP: Create a 3D effect
With Gimp you can give your recordings a chic 3D effect. We'll show you how to create realistic images.
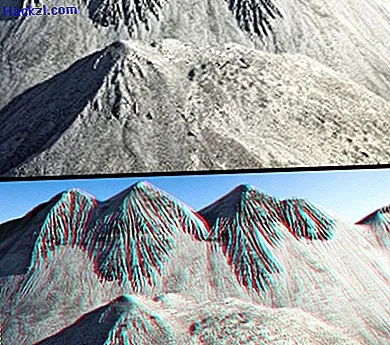
3D effect for your pictures: not difficult with Gimp!
Many people associate images with a 3D effect with professional image editing. It is very easy to achieve the well-known red-cyan effect with Gimp. The exact settings can be found again in our picture gallery.
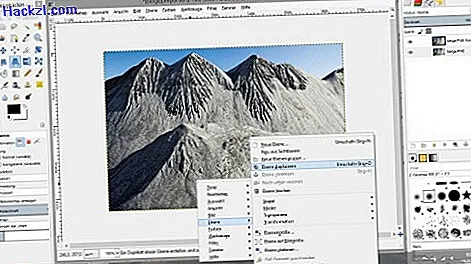
- Open the picture in the gimp. Right click on your photo and select "Duplicate Layer". You can now see the two levels on the right.
- Choose the first level. In the "Colors" menu, click on "Values". Here you set the target values for the green and blue channels to "0".
- Next, switch to the second level and this time set the color value for the red channel to "0".
- In the layer window you can see how the picture has changed in each case. Now change the mode of the layers to the value "Screen".
- Now you have to move the second level a bit to the left. To do this, select the move tool. You can find it in the "Tools" menu under "Transformations".
- Your 3D picture is ready! Without special glasses, you will only see the image blurred in red and blue tones. The effect is only really visible with 3D glasses.
If you work with Photoshop instead of Gimp, you can also create a 3D logo.
Latest videos
First duplicate the image layer.
Reduce the different channels in the "Values" window. This is how the 3D effect is created later.

Finally, move the upper level and set the level mode to "screen".
