Gimp: combine images over layers
Related Videos: Gimp tutorial - How to combine / blend two pictures together (May 2024).
With the Gimp image processing program, you can combine several images with each other and create beautiful collages. In this practical tip we will show you how. You can also see the individual steps in the picture gallery.
Combine photos using individual layers
In our practical tip we show a simple example with only two levels. First, just open the image in Gimp that will serve as the background. Now it is time to prepare further layers for the collage in Gimp.
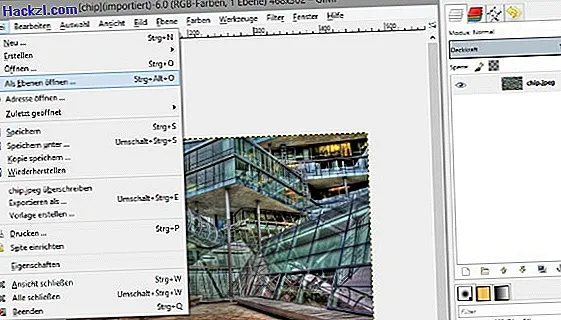
- Open the next picture for your collage via the menu "File" -> "Open as layer".
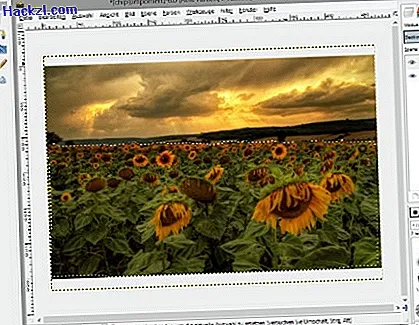
- Cut out the part of the image you want to use. It is best to use the free selection. You will find this in the toolbar as a lasso symbol. Use the tool to mark the outline of the object to be cut out.
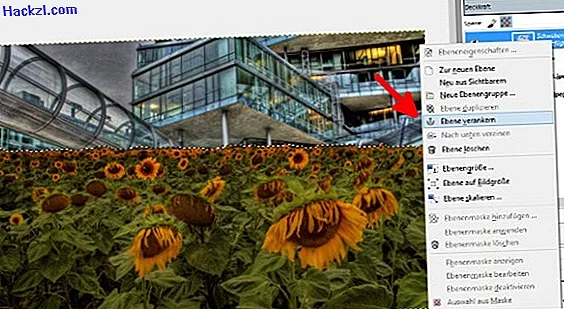
- When you have completed the marking, go to "Visible Copy" via the "Edit" menu.
- Activate the new layer and paste the copied selection via "Edit" -> "Paste".
- You will now see in the layer window that a "floating selection" appears. Right-click the layer to open the context menu. With the function "Anchor level" you can cancel the floating selection.
- If you hide the visibility of all layers except for the background and the selection level just created, you can see how your collage is slowly being created in the editor.
- Repeat these steps for all the images you want to add to the collage.
The fine work - adaptation and arrangement in the editor
Until now, you have one or more layers that you have left free for the collage in addition to the background image. However, the pictures certainly do not yet fit together in terms of size, perspective and arrangement. Now comes the fine work.
- Activate the level you want to set first in the collage. For a better overview, it is best to hide the others except for the background.
- Place the picture in the place of the background where you want it to sit later.
- Adjust the size using the "Scale" tool. You can find it under "Transform" in the menu item "Tools". The size doesn't have to be exact yet.
- In our example, the flowers should be placed on the way. To make the perspective adjustment, edit the image with the perspective tool that you can find again under "Tools" -> "Transform".
- Once you have found the right perspective and the right size after trying it out, place the picture exactly where you want it.
- Incidentally, you can easily repair small irregularities on the edges with the eraser in a soft setting.
- You must now repeat all of these steps for each level that you want to set in the collage.
Done - but expandable!
Your first collage is ready! Once you save them with the individual layers, you can edit them later - i.e. delete them. But you can also expand the collage at any time as a jpeg or png file.
If you enjoyed the practical tip, you will surely create many beautiful collages. If you want to learn more about image processing with Gimp, read how to create a 3D effect with Gimp.
Latest videos
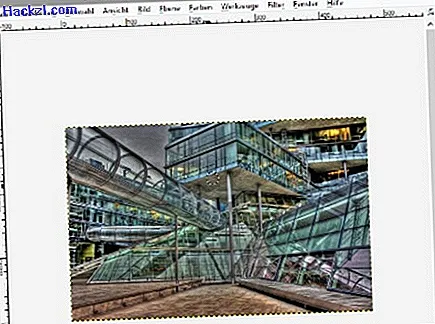
Choose an image to use as the background
Load the next image as a layer in the editor
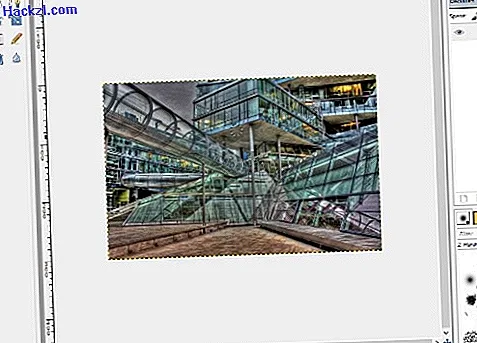
Mark the desired area with the lasso tool
A new layer with a transparent background

Here you anchor the floating selection
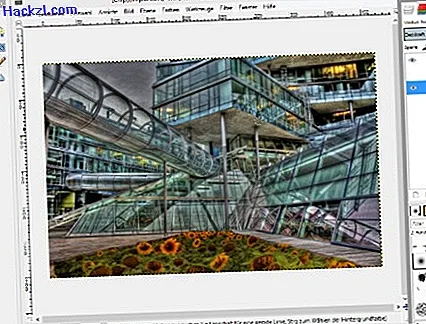
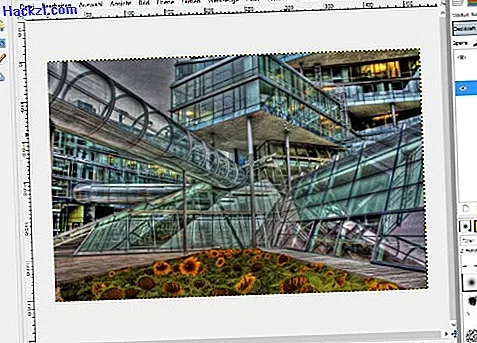
The finished collage - expandable as you like!