
Gimp: Color comics - how it works
If you want to quickly color comics, caricatures or monochrome drawings, you have a good tool at hand with "GIMP". The open source software comes with various tools to bring color to the sheet. Read here how to get from the black-and-white drawing to the finished color image.
Preparation: The original in black and white
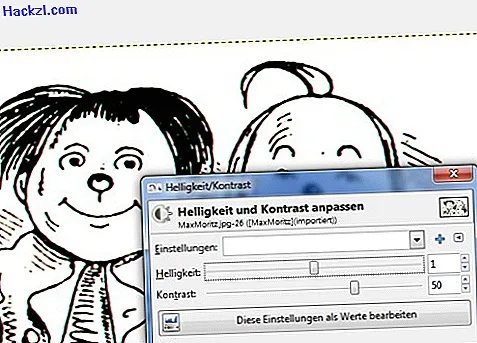
The original image should be in pure black and white. Scanned drawings often still have color blemishes. You can remove them by increasing the contrast of the image. You can do this via the menu »Colors« -> »Brightness / Contrast« using the slider or you can adjust the color values via »Colors« -> »Curves«.
This is how color comes into the comic: Color in layer by layer with GIMP
Save the optimized initial drawing in GIMP format .xcf so that you can work with different levels as follows:
- First, separate the actual drawing from the background. To do this, open the "Colors" menu and select "Colors for transparency". In the following dialog box, confirm that the white background should be replaced by transparency.
- Finally, create a new, white background layer using the layer window or the menu item »Layers« -> »New Layer«. GIMP already suggests the right values for you.
- It makes sense to create a separate level for each group of elements. Simply duplicate the transparent layer as many times as you need. The quickest way to do this is to use the SHIFT + CTRL + D keyboard shortcut, which is used to duplicate the active layer (highlighted in blue in the layer dialog). For Max and Moritz in the example, these were four levels: background, face, hair, clothing.

Pick up a paint bucket and brush!
- The fastest way to color closed areas such as the background or the faces in the example is with the "Fill" tool (paint bucket icon). It is important that "Behind" is selected as the fill mode so that the contours of the caricature or drawing are retained. You select the color by clicking on the color areas below the toolbox.
- The best way to color smaller areas is to use the brush tool. Choose a suitable brush size and make sure that "Behind" is activated as the color mode. If you only work on one level at a time, it does not matter if the color runs out of the contours: With the "Eraser" tool, you can quickly remove that.
- If you want to color differentiated drawings or mangas, you should also set accents in color areas such as shadows or light effects. For this there is the tool "Dodge / Postexpose" in GIMP. You can find it in the menu under "Tools" -> "Painting Tools" or activate it with the keyboard shortcut SHIFT + D.
- Always save your finished work in XCF format so that you can quickly make changes later. GIMP also supports all common image formats. If you want to save your file in JPG or PNG format, you have to go via the menu item »File« → »Export«.
Max and Moritz were colored with GIMP version 2.8.6. GIMP is a free but powerful image editing program that (almost) comes close to "Photoshop". You can find examples of interesting tasks that you can successfully master with GIMP in our practical tips.