GIMP: The most important functions for beginners
If you are looking for a free alternative to Photoshop, you will end up with GIMP sooner or later. We explain important functions to you here, because getting started in the program is not easy. The powerful freeware contains functions similar to those of Photoshop for professional image editing.
First start of GIMP
After successfully installing and opening the program, you will see the typical GIMP interface: on the left you will see tools and their finer settings, on the right you will see your created layers, advanced texture and brush settings. The filters and color settings that are important for photo editing can be found in the system bar at the top of the program. These are usually divided into subcategories again - so the program appears clearer. To insert a photo in GIMP for editing, proceed as follows.
- Open an existing image via "File" and "Open". Alternatively, you can also create a new project. You can set the resolution and size of the image yourself.
- The selected image appears in the middle - the processing area. In the layer management on the right edge you can see a new layer with your picture. The yellow and white dashed outline shows you up to which limit the current area extends.
- You can hide the current level with the small eye symbol. If you want to delete the level, right-click on the level and select "Delete level".

The tools of the photo editing program
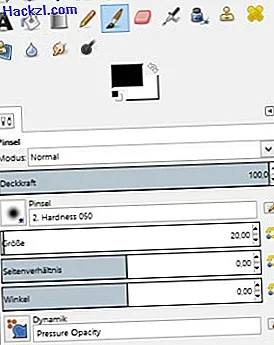
On the left side of the program you will see various tools that are available in GIMP. If you move the mouse over one of the tools, the name and function of the tool will be explained. Under the tools are the color settings for drawing brushes or the like. The front color stands for the foreground, the rear color for the background. If you are the owner of a Wacom graphics tablet, you can switch between the colors by turning the pen. In the brush settings you can refine the properties of the brush tool. Here you can choose different brush tips and you can define the size and dynamics of the brush. The most important tools at a glance:
- With the selection tool you can mark an area of a level. You can then only use a brush, for example, within this selection. The marked areas can also be copied and pasted elsewhere. The selection of your own shapes is made easier for you by the magic wand or the free selection.
- The shape tools allow you to customize the appearance of layers or a selection. For example, you can rotate, scale or distort a selection.
- You can use the painting tools to draw your own sketches. This is a lot of fun, especially with a graphics tablet. With the eraser you can quickly remove wrong lines.
- If you want to add text to your pictures or sketches, you can do so with the text tool. GIMP creates its own text level, which you can manage just like other levels.
The filters in GIMP
With the filters you can add chic effects to your selection or entire levels. You can find the different ones sorted by group under "Filters" in the file bar. The various filters range from practical image improvements to real art effects. Here is a small selection of chic filters:
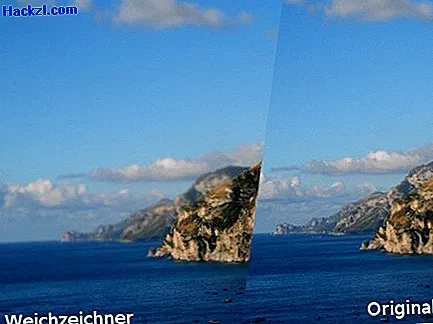
- With the "Gauschner soft focus" you can give your picture a chic depth effect with a little trick. Duplicate the area and apply the filter on the top layer. If you now use the eraser to remove selected parts of the upper surface, depth of field will appear.
- With the "cartoon" effect and other filters from the art category you can enhance your photos artistically. You can determine how much the effects should overlay the photo.
- Under "Map" you will find the bump map filter. Originally intended for creating textures with elevation values, you can also use them to visually improve your photos. After making your own fine adjustments and applying them, rough surfaces look much more plastic and realistic.
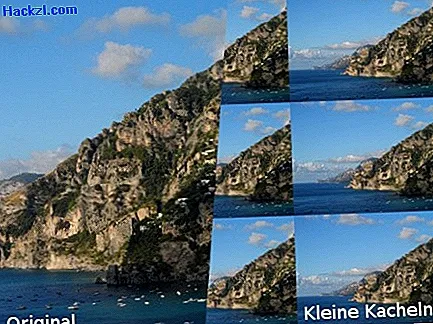
- Very practical for passport photos or the like: With the "Small Tile" filter, the image is automatically scaled and repeated in an adjustable number of small images. This saves you time-consuming copy-paste work.

GIMP - Useful tips and tricks
There are many shortcuts and tricks to make working with GIMP easier. Here is a small excerpt:
- With "Tab" you can quickly show and hide the functional areas to the left and right of the editing area.
- Anyone who misses the Paint line tool: With "Shift", the last point is focused when drawing: If you now draw a point at another point, a straight line is created between the points.
- With the space bar pressed, the image can be quickly moved using the mouse.
- Under "Windows" and "Single window mode", the functional areas can be easily detached from the program and attached to them.
- If you don't like your last changes, you can use the key combination "Ctrl" + "Z" to undo the last steps.
In the instructions, GIMP 2.8 was used under Windows 8.1. If you would like to create auxiliary lines in GIMP, this practical tip shows you how it's done.
$config[ads_text6] not foundLatest videos
With the selection tool you can mark any shapes, which are then selected for processing. For example, the "Fill" tool fills the marked area with a color.
Using the shape tools, you can distort entire layers three-dimensionally, change the size or rotate the surfaces.
Different brush tips and settings are available. The size of the brush can also be changed or rotated without limits.
With the integrated text tool you can quickly insert captions or design professional logos.

After applying the blur filter to parts of the image, the sharp elements of the image continue to appear in the foreground.
The cartoon effect turns your pictures into chic works of art. The outlines of the photo objects are drawn with black paint.

The bump map plastically reinforces angular elements of the image. You can also apply this effect with another layer, which creates a chic relief.

With the "Small Tile" filter, your image will be reduced in size and automatically multiplied. This is particularly useful for passport photos.