Gimp: Create dramatic sky - how it works
This practical tip shows you how to create a dramatic sky with Gimp.
More drama: sky effect in Gimp
A dramatic sky gives a picture a completely different expression. You can also see how to achieve the expressive effect step by step in our picture gallery.
- First open the picture in Gimp.
- Duplicate the background layer and set the layer mode to "Multiplication".
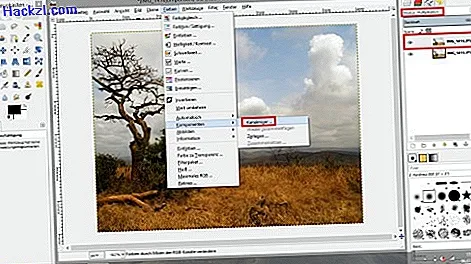
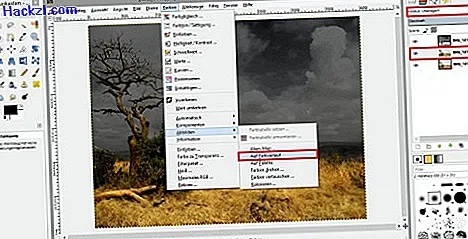
- Now call up the "channel mixer". You can find it in the context menu of "Colors"> "Components".
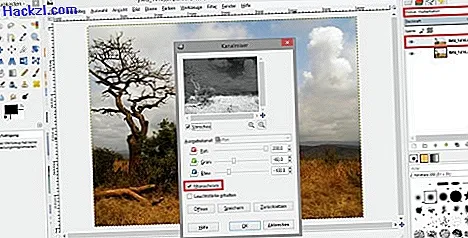
- In the "Channel Mixer", first check the "Monochrome" checkbox. Then you have to play a little with the values for red, green and blue. The goal is a dark blue, threatening sky.
- Switch back to the background layer and duplicate it again. For the new level you set the mode "overlay".
- For the next step, the foreground color should be black and the background color white. Then navigate to Colors> Map> On Gradient.
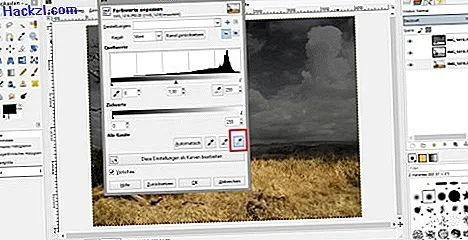
- To get more contrast, the clouds must be displayed in a bright white. To do this, click on "Colors"> "Values" in the menu. In the dialog box, select the white point. This is the rightmost button with the pipette symbol under "All channels". Click on it and then on the brightest point of a cloud in the image.
- Finally, the luminosity of the sky is missing. To do this, duplicate the background layer again. Place the new layer at the top and select "Layer" as the layer mode. Next, go to "Colors"> "Hue / Saturation" and maximize the slider at "Saturation".
These instructions refer to Gimp 2.8.10. Another impressive effect is the HDR effect with gimp. Read another practical tip on how to achieve it.
Latest videos
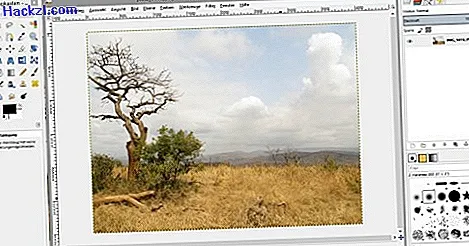
A photo with a large proportion of sky is suitable as an original for this effect.
The channel mixer brings the first dramatic effects.
The monochrome setting on the channel mixer is important.
The color gradient from black to white reinforces the dynamics of your sky.
Use this button to set the white value and give your photo the finishing touch.