
Gimp: dye hair - how it works
GIMP is a very extensive image editor that you can use to dye hair. This practical tip provides the instructions.
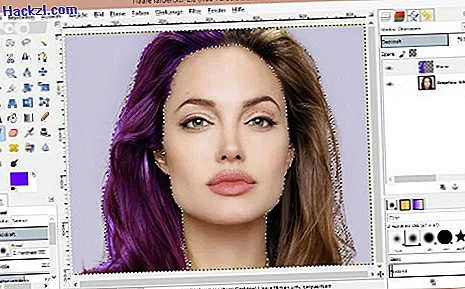
GIMP: dye hair
With the free program "GIMP" you can even change the hair color with the appropriate tools. That's how it works:
- Import picture: In GIMP click on "File" -> "Open ..." and select your picture.
- Mark hair: There are several ways to select hair. You can either use the magic wand or create a path. The magic wand can be found in the left toolbar. The program automatically recognizes similar color sections in the area. Alternatively, you can also create a path around the hair. To do this, click on "Paths" in the toolbar and set anchor points around the hair. Finally, click on "Selection from path" on the left.
- New layer: Now create a new layer in the menu bar under "Layer" -> "New Layer ...". Give the level a name. The "level fill type" must be set to "transparency". To make the color visible on the picture, you have to overlay this layer. To do this, select the "Overlay" mode in the right layer window.
- Color: Now color comes into play. Choose a suitable foreground color and paint the hair with the brush. You can also dye the entire hair at once with the "Fill" tool. If the color is too strong for you, reduce the opacity of the layer on the right.
Also read how to crop objects in GIMP.