
GIMP Tutorial: The 5 most important functions simply explained
Related Videos: GIMP in Less Than 10 Minutes: Beginners Guide (May 2024).
If you are working with GIMP for the first time, a tutorial is just the right thing so that you are not overwhelmed by the variety of functions. To help you get started, we will explain the 5 most important functions.
GIMP Tutorial: Cropping pictures made easy
Familiarize yourself with the toolbox in GIMP, you are probably wondering what some symbols mean or where you can find specific functions.
- A feature that is often used when editing photos and graphics is "cropping".
- You will find this function directly in the toolbox. The symbol is a square, the corners of which overlap - it is marked in red at the top of the image.
- When you click the icon, your cursor becomes the crop tool. You can now click and drag the area of the image you want to crop.
- If you are satisfied, simply press the Enter key so that the selected area becomes a complete image.

Select filter in GIMP - simple effect with great effect
There are various filters in GIMP that you can apply to your image. In this way you can quickly and easily get an interesting effect for your picture or even repair it.
- Open GIMP and an image, you will find the tab "Filter" above. At first glance you will notice that there are a variety of options here.
- If you apply a filter, you can usually determine different values and parameters. You can see the change directly in the image preview.
- For example, under "Improve" you will find options to remove red eyes from photos or to improve noise on photos.
- "Artistic", on the other hand, gives you the option of letting your image shine in Van Gogh style or drawing it like a comic.
- If you are satisfied, click on "OK". If you just close the window, the filter is not applied.
Make a selection: Different options in GIMP
In image processing, it is often necessary to select only certain objects. These can then be edited or cut independently of the rest of the image.
- To select a rectangular or oval area, you will find the symbols in the toolbox that you are probably familiar with from other image processing programs. The selection symbols are usually shown with dashed lines.
- Select the tool and drag the selection over the desired area. With a right click you can select various functions in the context menu.
- By the way, you will also find the practical tool "Invert" under "Selection". This will reverse the selection and select everything that was not previously marked. This is particularly useful for editing a background.
- With photos or pictures, it is often the case that the selection you want to make is neither oval nor rectangular. With the magic wand symbol you can, for example, select an area with similar color values.
- If this does not help you either, click on the lasso symbol. Zoom in a little closer to the image with [Ctrl] + [Mouse wheel] and select hands-free.

Transparency in GIMP
If you want to make a background transparent or cut out an object from one picture to insert it into another, proceed as follows:
- First select the area you want to cut out.
- Remember that you can also invert the selection. If you want to make a background transparent, select the object in the foreground and then invert the selection.
- Once the correct area is highlighted, you have several options. If you want to remove the selection, simply press the delete key on your keyboard. Then you see a gray-black checkered background - that's the transparency.
- If you want to crop an object, press [Ctrl] + [x] as soon as you have selected it. This will cut it out.
- Use [Ctrl] + [v] to paste the element into another picture. This can be a transparent new image or a selected background.
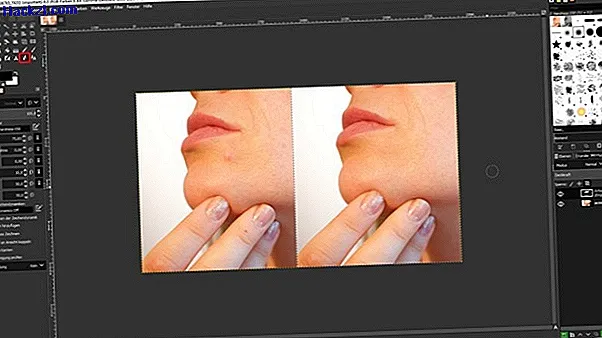
Retouch spots and blemishes in GIMP
With GIMP you can not only retouch portraits, but also make general stains on pictures disappear.
- To remove acne, a wine stain in your shirt or other disturbing factors, use the "Heal" tool in GIMP.
- Click on the patch icon and first set a size. You now select a position that you want to copy. To retouch a pimple, hold down [Ctrl] and click on a clean skin area.
- This should come close in color to the target location. So pay attention to shadows and light sources.
- Then you can release [Ctrl] and click where you want to remove a stain. You can also click more often if you have chosen the brush size too small.
In our next article we will show you how to display levels in GIMP.