
InDesign: Create business cards - how it works
With the professional software "Adobe InDesign" you can create your own business cards with pictures and text. You can read how to do this in this practical tip.
Create business cards with InDesign
InDesign is the professional tool for every layouter and designer. With the software you can design elaborate posters or flyers. With the Creative Cloud, InDesign also has its price. However, you can test the program free of charge for 30 days. This is enough for first experiences and you can also quickly create a business card.
- Start InDesign and create a new document. The usual sizes for business cards are suitable for size: height 55mm and width 85mm. You should also change the margins: choose 3mm.
- You will now see a blank white document. Select the text tool (T) from the toolbar on the left and drag a box of any size. It is marked by a fine blue line.
- Use the move and transform tool (black arrow at the top) to move the left border of the text field to the left margin (pink line). Do the same with the upper and lower limits. The right border is then moved to the middle of the document. A pink line will appear when you are in the middle.
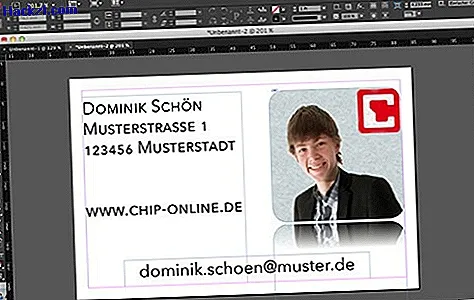
- Back to the text tool: With it and by clicking on the text field you can enter your business card information. In the menu bar at the top you can also make changes to the font, font size, etc.
- By adding new text fields, you can also place text in the middle or right. This works the same way as in step 3.
- You can then insert pictures or patterns into your business card via "File" and "Place". You can place them just like the text and change their size. Mirror effects and twists can also be set in the menu bar at the top.
- For later changes, save the document as an InDesign file under "File" and "Save". You can also save your business card as an image under "Export".
Can't handle InDesign? In another practical tip, we will explain how you can design your own business cards using Microsoft Word.