
iPhone 6s: HomeButton defective - so replace it
Related Videos: iPhone 6S Home Button Replacement done in 2 Minutes (May 2024).
If the home button on your iPhone 6S is defective, you can replace it yourself. This practical tip shows you exactly how to do this.
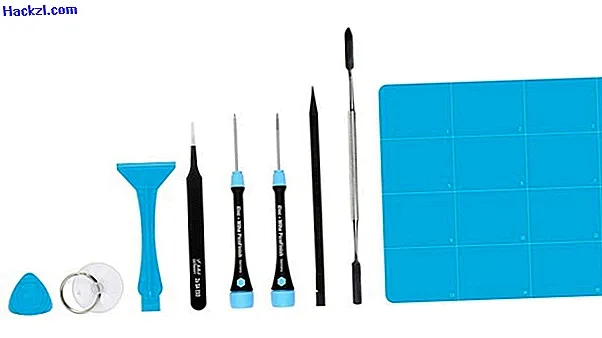
Preparation: Tool and new HomeButton for your iPhone 6s
- In order for the exchange to succeed, you first need a new HomeButton and the right tool. You can find the tools you need at iDoc.
- You also need a hot air dryer to detach the display. Alternatively, you can use a normal hair dryer.
- You should also sort the screws as you removed them so that you do not confuse them later.
- Note: We recommend that you do not carry out the replacement of the HomeButton yourself, as the fingerprint sensor will no longer function properly due to the replacement.
Step 1: remove the display and loosen the screws
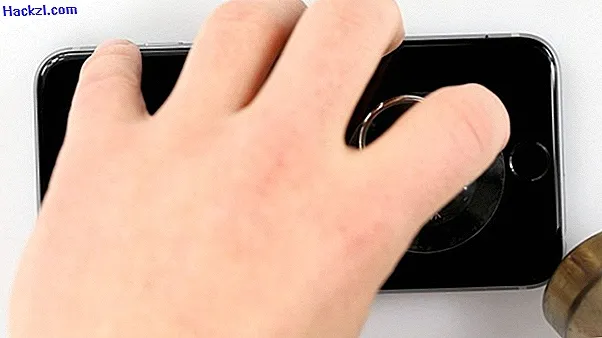
- First switch off your iPhone so that there is no short circuit and then loosen the housing screws next to the Lightning connector with the pentalobe screwdriver.
- Then warm up the display and attach the suction cup near the Home button. You can use the picks to raise the display.
- Try carefully to lift the display. If this is not yet possible, you must continue to heat it until you can lift it.
- As soon as the display can be lifted, carefully fold it over. So that no cables are damaged, it should be tilted by a maximum of 90 degrees.
- Tip: If your display is badly damaged, tape it off with parcel tape so that it is not further damaged.
Step 2: Loosen the battery contacts and screws
- Now remove the two screws on the battery contact with the Philips screwdriver and remove the battery cover. Then carefully detach the contact using the spudger.
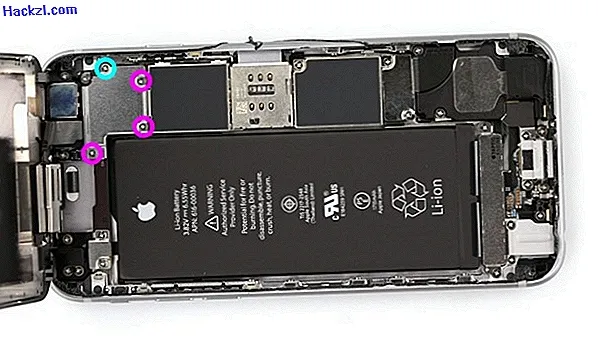
- Then you have to loosen the four screws on the top left. To do this, take the Philips screwdriver again and then remove the cover again.
- There are three cables under the cover, which you must carefully lift and loosen again with the spudger. First disconnect the right cable, followed by the upper cable. Finally, disconnect the cable on the left.
- Now you need to remove the earpiece by loosening the three screws and then carefully removing the earpiece.
- The next step is to remove the back plate. To do this, you have to loosen eight screws. Note: Place the screw on the left and on the right side separately from the others.
- To remove the back plate, you have to remove the two stickers and then carefully lift them.
Step 3: replace HomeButton
- To remove the defective HomeButton, you must first loosen the two screws.
- You then have to disconnect the cable. It is best to use the spudger again.
- To release the HomeButton, gently push it in from the outside, as it is glued to the pane.
- Then carefully lift it out and then insert the new HomeButton.
- Now connect all cables and fix the new HomeButton with the two screws.

Step 4: assemble iPhone
- If you have successfully installed the new HomeButton, you must now reassemble the iPhone.
- To do this, put the back plate back in and screw it back on with a total of eight screws.
- Then put the earpiece back in and screw it in with the appropriate screws. Then put the cover back on.
- Reconnect the cables for the display in the same order. Start with the right cable, followed by the top cable. Finally connect the left cable. Then screw the cover.
- Now connect the contact for the battery to the logic board and put the cover back on.
- As soon as this is done, you can carefully flip the display back and press it down by pressing the HomeButton.
- Finally, tighten the two housing screws next to the Lightning connector and you're done.
We will show you how to change your display on the Apple iPhone 6s in the next practical tip.