
KeePass: A tutorial for the password manager
The password manager KeePass helps you to securely collect and manage all your passwords. In this tutorial we will introduce you to the program and show you how KeePass works.
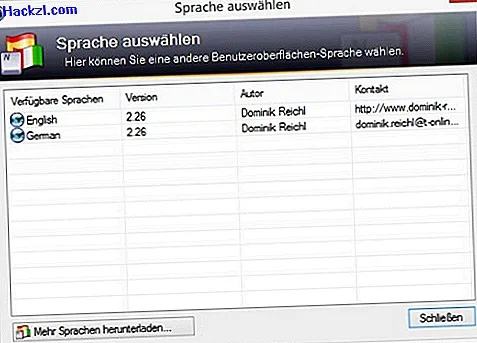
Tutorial step 1: Install KeePass in German
KeePass is available in versions 1.X and 2.X. Both programs are always supplied with updates, but KeePass 1 is somewhat poorer in functions compared to KeePass 2.
- By default, KeePass is installed in English. You can download the German language file from KeePass.info.
- Unzip the ZIP file and place the .LNG or .LNGX file in the "C: \ Program Files (x86) \ KeePass Password Safe" folder.
- Start KeePass again and click on "Change Language" under "View" above.
- Double click on "German" and confirm with "Yes". KeePass now starts in German.
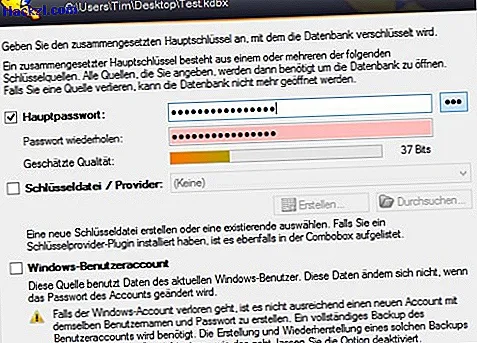
Tutorial step 2: Set up the KeePass database
In this guide we use KeePass 2. Some functions may be missing under KeePass 1. In addition, some are titled or arranged differently.
- In order for all passwords to be saved, you must first create a database. To do this, click on "File" and "New". Select a storage location and a name here and click on "Save".
- Now you will be asked for the master password. With this you have access to all your passwords, so choose an extremely secure one. If possible, use large and small letters, special characters and numbers. The same applies: the longer the better.
- If you then click the "OK" button twice, the new database is created.
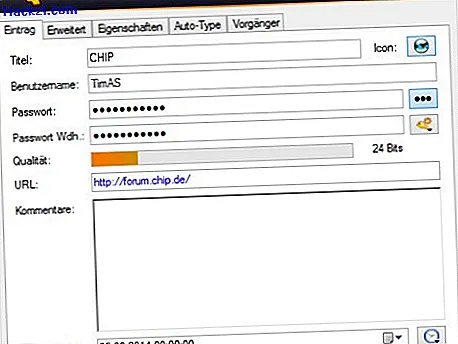
Tutorial step 3: create passwords in KeePass
You will now see some categories in the navigation bar on the left. Among these there are already some example entries that you can simply delete. Now we will insert our first password in KeePass.
- Select one of the categories that the password matches and click the "Add Entry" option under "Edit" above.
- Enter the following data one after the other: The name of the website, your user name (this can also be your email address for many login pages), your password and the URL of the website.
- If you then click the "OK" button, the first entry is created. You can now repeat this for all other login data.
Tutorial step 4: Login to websites via KeePass
- Select the desired entry in KeePass and press the "Ctrl" + "C" keys. The password is now saved on the clipboard for 12 seconds. You can then insert it again on the login page using "Ctrl" + "V".
- It is even easier if you click with the mouse in the upper login field of the website, i.e. where you would have to enter your user name or your email address. Then switch to KeePass, select the corresponding entry and press "Ctrl" + "V". You will now be logged in automatically.
- You can also select the entry in KeePass and use the key combination "Ctrl" + "U". The website is opened directly in the browser. After that, however, you still have to do the previous step.
In the next practical tip, you will learn how KeePass compares to the Password Manager.