
Connect the hob and oven separately - it's that easy
If you have a cooktop and a separate oven, you must connect both separately. Otherwise, especially with old power connections in the apartment, it can happen that the fuse blows out when used at the same time. This guide shows you step by step how to connect the oven and hob separately.
Connect the hob and oven separately
Electricity with 230 to 400 V voltage is involved in a hob and also in an oven. You should only have such devices connected by an electrician. If you observe all the necessary safety precautions, these instructions show you how to connect both devices correctly:
- For this to work, the hob and oven need a separate stove connection with three phases. Some ovens also manage with only one phase, you can see this by looking at the cable of the oven.
- Always switch off the fuses before connecting and secure them against being accidentally switched on again. There are three fuses for stove connection sockets. If you are not sure, turn off the residual current operated circuit breaker.

Connect the hob separately from the oven
Today, modern kitchens can be individually planned and furnished. Many hobs are available for purchase individually, so they have their own power connection and do not require an additional oven underneath. How to connect the hob:
- Open the lid of the stove connection socket underneath the worktop and use a two-pole voltage tester to check whether all connections are voltage-free.
- If the hob already has a connection cable, lead the other end to the stove connection socket.
- If there is still no connection cable on the hob, you need a 5-core cable with at least 1.5 mm2 wire cross-section. You can even get them cut to the desired length in any hardware store or alternatively directly with luster terminals. The stripped wires at both ends are provided with wire end sleeves for better contact.
- Connect the respective wires to the hob (if there is no cable on it). Start with the green / yellow protective conductor. Then attach the strain relief.
- Screw the wires on the other side of the cable to the correct contacts of the luster terminal in the stove connection socket. Here, too, the protective conductor is first and the strain relief is the last. Then close the lid of the can.
- Check all the functions of the hob before you finish the installation.
Connect the oven separately from the hob
The oven no longer has to be installed underneath the hob, but can be integrated into a tall cabinet at a convenient height. The connection line should be long enough so that you can easily connect the oven and put it in the cabinet.
- Open the lid of the second stove connection socket planned for the oven and also check here whether all connections are voltage-free.
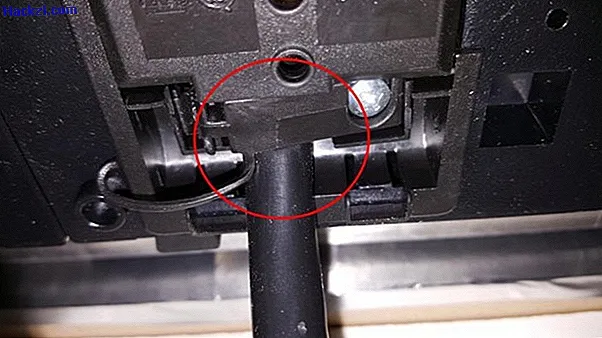
- Connect the connecting cable to the oven if it does not have a prepared cable. When buying, make sure that the oven gets by with one phase or uses three.
- Guide the other end of the connection cable to the luster terminal in the stove connection socket and connect the respective wires to the connections on the socket. Start with the green / yellow protective conductor.
- Screw the strain relief tight and put the lid back on the box.
- Before you completely install the oven, check all of its functions.

Perfectly clean the oven: even stubborn dirt goes away
On the next page, we will show you which suitable hob you should buy and what you should pay attention to.