Soldering LEDs: Instructions
You will find soldering instructions everywhere. But if you want to solder LEDs, there are important key figures that you have to consider. LEDs have to be soldered the right way round and also need the right voltage, which they usually get from a series resistor. In our practical tip, we show what is also important.
How to solder LEDs
Soldering LEDs is not difficult in itself. However, fluorescent diodes are very sensitive. They do not tolerate high voltages, especially in the case of reverse polarity. In the following, we will explain how to connect an LED and calculate the required series resistor. If you do not know the characteristics of your LED or you cannot tell which leg is the anode and which is the cathode, the structure that we show in the picture gallery will help you.
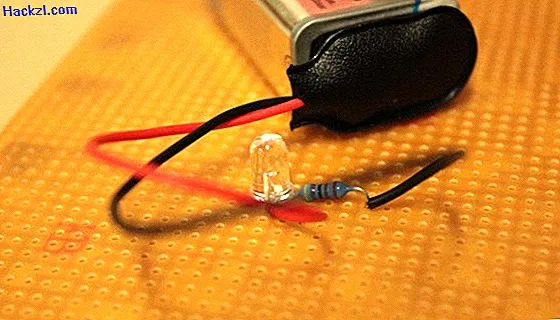
- To operate an LED, you need a battery, a resistor, a battery clip and of course the LED.
- The long leg of the LED identifies the anode and the shorter one the cathode.
- The anode is connected to the positive pole (+) of the battery, the cathode to a resistor, which is connected on the other side to the negative pole of the battery.
- Operate the LED with its forward voltage, which is marked as U with the index F (here UF).
- The current that is to flow through the LED is identified as I with the index F (here IF).
- If the battery voltage (UB) is specified and you know the forward voltage and current of the LED, the required series resistance (R) is calculated as follows: R = (UB - UF) / IF

Latest videos
Have a multimeter ready and follow our setup: Connect the negative pole of a battery with an adjustable resistor. Behind it go to one leg of the LED - the other leg of the LED comes to the positive pole of the battery. 9V block batteries, as shown here in the photo, have a voltage that is significantly too high for most LEDs. Better use 2 to 4 volt batteries.
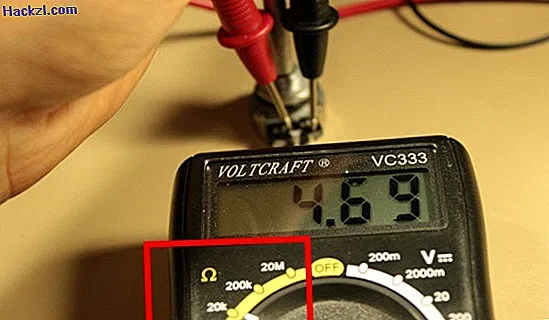
Check the voltage of the battery. Empty batteries often have a significantly lower voltage. Use a potentiometer with the highest possible resistance, such as this linear 25k ohm potentiometer. Turn it to the maximum resistance, i.e. maximum counterclockwise.

Now turn up the potentiometer a little. Check with a voltmeter that you get around 1.5V. If you are unsure whether the LED is facing the right way, turn it over. Turn the potentiometer so that you take steps of approximately 0.2 V and turn the LED with each step. Go down with the resistance or up with the voltage until the LED lights up.

If you now remove the potentiometer from the circuit, you can use the multimeter to determine which series resistor you need. Here it is 4.7k ohms.
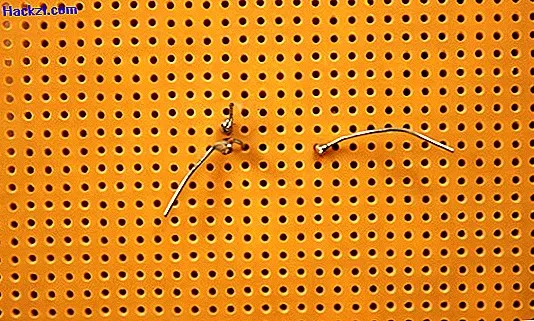
Now put the same structure on a perforated board. Replace the potentiometer with a resistor.

On the back it looks like this. The strands of the battery clip fit into a hole together with the leg of the resistor or the LED. The resistor and cathode leg of the LED are inserted into adjacent holes and wrapped around them.

So you just have to solder in the three places.
The result is an LED that lights up red as long as the block battery is plugged in. Attention: This LED has an unusually high forward voltage. You usually need larger series resistors or one or two AAA batteries.