
Libre Office: Create pivot table
In this practical tip, we explain how to create a pivot table using LibreOffice Calc.
Step 1: create table and create pivot table in Libre Office
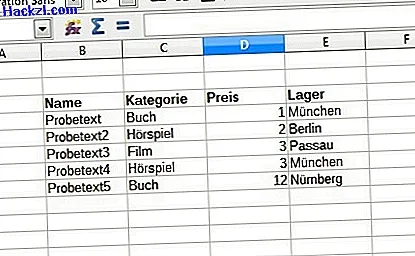
First create a regular table in LibreOffice. You can simply write the data in the corresponding columns (see screenshot).
- Click on a cell in the table and select "Data" from the menu bar.
- In the opened menu, go to "Create" via "Pivot table".
- The "Select source" window opens. Leave the selected option "Current selection" here. Libre Office automatically recognizes your related data.
- Confirm with "OK".
Step 2: Define pivot table layout
Then the "Pivot Table Layout" dialog opens. Here's how.
- The pivot table is initially empty. You can see your available fields in the left display.
- You can now assign the fields to the desired areas. You can do this by marking the field and then dragging into the respective section.
- Numerical data are normally evaluated in the data fields. It is therefore advisable to classify the "Price" field in the example presented above.
- If you then click on "Sum price" under "Data fields", you can choose another function.
- Please note that you can also activate or deactivate other options under "Settings". Here you can "ignore empty lines" or "recognize categories".
- Confirm the creation of the pivot table with "OK".

Step 3: Evaluation of the pivot table
Another sheet is now automatically added to your file. There you will find the pivot table you just created.
- If you click on "all" above the table, you can remove certain data from your table. At this point, this is now based on the "side panel".
- In the example presented here, the "warehouse" was specified as the side field when creating in step two. You can now have all products from the warehouse in Munich displayed.
- The data field "Price" in the table calculates the total price of all selected products.
- You can also remove individual data from the table using the drop-down menus of the row fields.
