
Lightroom: Cut out objects - how it works
Related Videos: How to EDIT PHOTO in Lightroom in Mobile (May 2024).
With the image processing software Adobe Lightroom you can quickly cut out individual image objects. We show you two different ways in which you can free objects.
Crop and crop the image in Adobe Lightroom
You can cut out individual objects in different ways, for example by simply cropping your image:
- In Lightroom, open the image in question in development mode.
- Go to the "Exemption Overlay" tool in the top right. Alternatively, you can also use the [R] key on your keyboard.
- Then click on the small lock symbol to unlock the aspect ratio.
- A virtual frame then appears above the picture. By moving the corners with the mouse pointer, you can change the size of the frame and place it over the object to be cut out.
- Then click "Done" and the image will be cropped accordingly. However, you can still change the image section later.
Use the Brush tool to crop objects in Lightroom
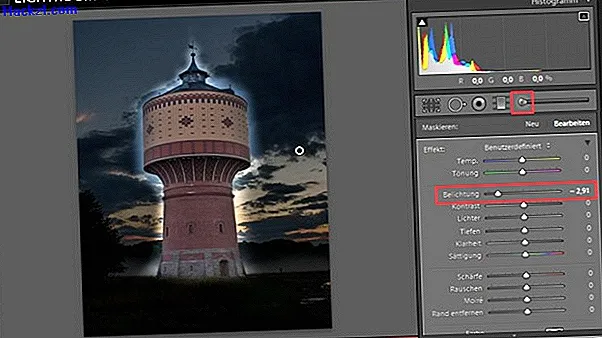
Alternatively, you can free up your desired object by darkening or brightening the area around the image object:
- Open the relevant image here in development mode.
- Go to the "Correction Brush" tool. Alternatively, you can use the [K] key here.
- Depending on whether you want to lighten or darken the area around the object, move the slider to the right or left under "Exposure".
- Then move the mouse pointer over the entire area around the image object. This becomes correspondingly lighter or darker and the object appears visually.
- You can easily change the size of the brush using the scroll wheel on your mouse. To change the radius of the soft edge, press the [Shift] key before scrolling.
- If you have accidentally painted over the object with the brush, simply use the [Alt] key: This turns the tool into an eraser that you can use to remove brush strokes.
- If you want to draw the area around the object completely white or black, use the brush tool on top of each other several times with maximum or minimum exposure.