
Install Mac OS X Mountain Lion - Here's how
In this practical tip, we show you how to properly install the Mac OS X Mountain Lion operating system. We will also tell you how to transfer the data and settings of an old OS-X installation.
Step 1: create Mac system backup
Before starting the actual installation, we recommend that you back up your old system to back up important data:
- Open the Spotlight search with the key combination [cmd] + [Space] and enter "System" in the input field. With [Enter] you get to the system settings of your Mac.
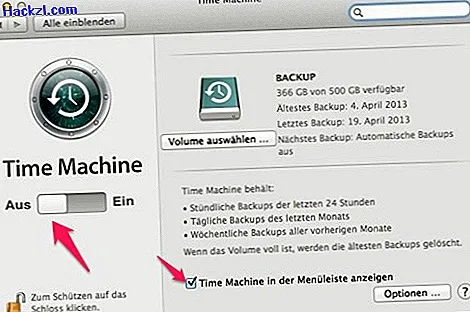
- Switch to the "Time Machine" setting. You can find this under "System".
- Set the slide switch to "Off" and make sure that the checkmark for "Show Time Machine in the menu bar" is set.
- Click the Time Machine icon at the top of the menu bar. This is the symbol with an arrow turning to the left.
- In the context menu, select the option "Create backup now".
- We have compiled further information on time machine backup in a further practical tip.
Step 2: download and install Mac OS X Mountain Lion
After the backup you can start with the download and the actual installation:
- You can find "Mountain Lion" in the App Store here. The operating system costs about 18 euros. You can pay for it by credit card, via Clickandbuy or an iTunes voucher card.
- You will then receive a content code within one working day, which you can redeem in the same way as an iTunes voucher. The download then starts automatically. The installation then also starts automatically.
- Accept the license terms and then select the target volume. Confirm by clicking on "Install".
- The installation program starts. You will be asked to close all running programs. The system then restarts.
- Now the installation begins. In the meantime you get little information about it. However, the remaining time is displayed.
- After successful installation, your Mac will restart again.

Step 3: Settings after installing OS X Mountain Lion
- After your Mac has restarted, there are now two options for how to proceed: If you installed the system on an empty hard drive, you must first make some settings such as language, keyboard or network.
- After the network configuration you will be asked whether you want to import data from another Mac, PC or another volume. You can skip this step with "Later" and do the action later.
- This is followed by basic settings such as activating the location and entering your Apple ID for the iCloud and iTunes services. A first user is then set up so you can start working on your Mac. This user has administrator rights.
- Finally, you can enter your data for product registration or skip the step for now. Installation and initial configuration are now complete.
Step 4: Take over old Mac data with the migration assistant
How to transfer old data and settings from a previous OS-X installation:
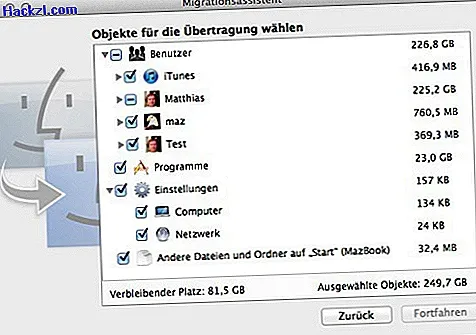
- You can use the migration wizard to import data from old installations later. You can use a different volume or a time machine backup.
- You can take over user accounts, programs and settings as well as other files outside of the standard system folders - such as documents, music or pictures.
- Simply mark the points you want to take over. A bar at the bottom shows you how much storage space is left and how large the selected options are.
Windows users should consider certain things when reinstalling the operating system. We have compiled an overview of these for you.