
macOS: Shrink PDF file
Related Videos: How to reduce your PDF File size on Mac OS X (May 2024).
If you want to reduce the size of large PDF files on your Mac for certain uses, you can use a special function of the "Preview" program. You can find out how it works in this practical tip.
Reduce PDF file on Mac OS X using on-board tools
No additional software is required to reduce the size of PDF files under Mac OS X. The integrated "Preview" program also does this:
- Open the desired PDF document with the "Preview" program. For example, by right-clicking on the file in the Finder. From the context menu, select the "Open with" and "Preview.app" options.
- Now click on "File" and "Export" in the "Preview" program.
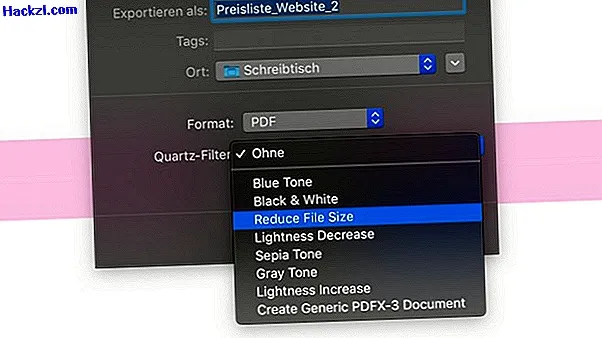
- It is best to give the file a new name, otherwise the original file in the target directory will be overwritten.
- In the lower window area, select the "Reduce File Size" option from the "Quartz Filter" dropdown box and then click the [Save] button.
- Tip: Then check the quality of the compressed PDF file. Depending on the contents of the file, other options such as "Gray Tone" can give better results.
macOS: Reduce PDF using ColorSync
If you don't like the result, there is another way to reduce the size of the PDF file without losing quality.
- Open the "ColorSync Utility" and switch to the "Filters" category above.
- To the right of the "Reduce File Size" entry, click the "Duplicate filter" option.
- With a double click on the new entry you can rename it "Reduce PDF".
- In the "Image adjustment" area, enter the value "144" for "Resolution". All other fields must be empty. Select "High" as "Quality".
- In the "Image Compression" area, select the "Mode" option as "JPEG" and move the slider to the center.
- If you close the window, the settings are saved automatically.
- Now you can reduce the PDF again with the instructions above. In the last step, however, select the "Reduce PDF" filter you just created.

Read here how to combine several PDF files into one document under macOS.