
macOS Sierra: Optimize storage - how it works
A new feature in macOS Sierra is the optimization of the memory. In this guide, we will show you step by step how to use the really brilliant innovation.
macOS Sierra: Optimize storage space
The theory sounds really awesome: At Apple's WWDC keynote in June, the feature presented as "Optimized Storage" was advertised as being able to free up to 130GB of space on a Mac with 250GB and 20GB of free space.
- You can find the option by clicking the Apple logo on the desktop at the top left of the screen. There, select the "Hard drives" tab under "About this Mac".
- Afterwards, macOS Sierra shows you the usage of your storage space in the bar chart. Under "Manage" you can select further actions for storage space, including the optimization of storage space.
- macOS Sierra shows you recommendations in the menu on how you can optimize storage space. For example, you can choose to automatically clean your trash here, a process that then takes place every 30 days.
- At the same time, you can also save all Mac photos and files in your iCloud - provided there is enough storage space in the Apple Cloud.
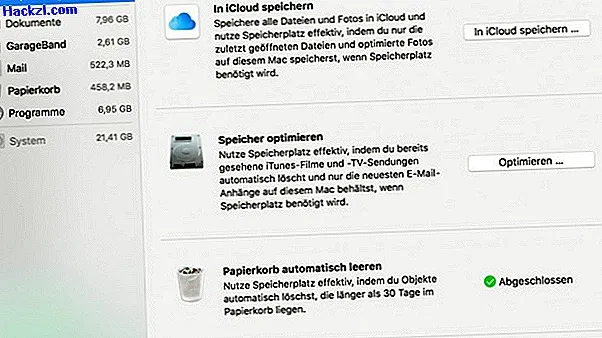
- Apple states that the OS independently regulates which photos and files are stored in the cloud and which are stored on the Mac's internal memory. The decisive factor is the use of the photos and files and the available storage space on your Apple computer or notebook.
- Another option for optimizing storage space is the automatic deletion of previously viewed iTunes films or series, as well as the removal of older email attachments.
- However, we advise caution: if you leave macOS Sierra in complete control over the relevance of individual photos and files, it can quickly happen that some images and documents inadvertently disappear and can no longer be found. We therefore recommend regular TimeMachine backups.
Instructions: Create Backum with TimeMachine
The next page shows you how to activate "Hey Siri" under macOS Sierra.