
Meshmixer: Tutorial for beginners
Meshmixer is a practical software for editing 3D models. In this tutorial we give you a first introduction.
Meshmixer tutorial: the first steps
First start Meshmixer and click on "Import" to import a new 3D model. This should best be in STL, PLY or OBJ format.
- With the right mouse button you can rotate the view and zoom with the mouse wheel.
- Further display settings can be found in the "View" tab. Here you can also display the wireframe of the object, for example.

Add templates in the program
With the button "Meshmix" you can already add some pre-made 3D models to your object.
- At the top you can access further collections of objects by clicking on the respective collection (in our case "primitives").
- To add a model, simply drag and drop it into your drawing area. You can then set the size and position.

Select and edit surfaces
With the "Select" function you can select and edit parts of the surface.
- For example, you can "smooth" the surface, make it look a bit rounder, cut a hole in the model at this point and much more.

Mesh mixer: edit 3D model
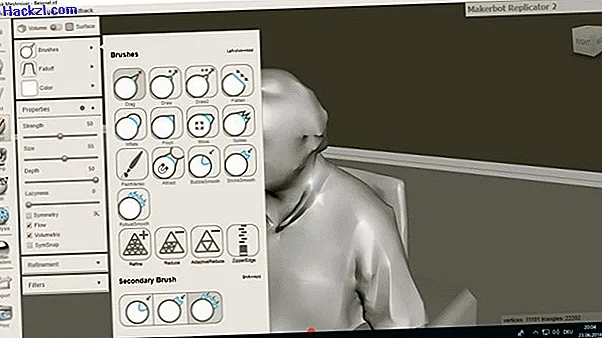
The most important thing with Meshmixer is the "Sculpt" function. With this you can edit your 3D model using different brushes.
- Choose a special brush under "Brushes". For example, you can drag and move individual points of the 3D model ("Drag") or flatten the model ("Flatten").
- In the properties, you can adjust various things, such as the thickness or size of the brush.
Add and extrude stamp
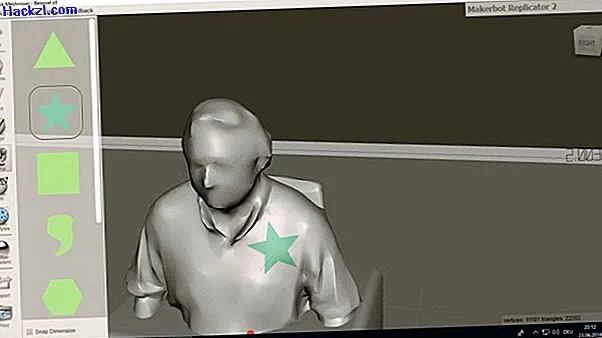
The "Stamp" function is also very practical. Here you can add a stamp to your object and further edit this area.
- To do this, mark a small area within the stamp (for the "Select" function) and then select "Modify" → "Expand to Groups". The surface is then correctly selected and can easily be extruded.
- You can also add your own stamp. To do this, draw a shape by selecting a surface. If you want, you can round it off with "Modify" → "Smooth Boundary". To convert this into a stamp, select "Convert to" → "Convert to stamp".
Meshmixer: Change model properties
The "Edit" function is also very practical.
- Here you can, for example, hollow out, fill or mirror the model.
- You can also scale the object, add a tube and much more.

Analyze 3D object in mesh mixer
The "Analysis" function is somewhat less spectacular but still important.
- If your object should have holes, you can, for example, check and fix this with the "Inspector" function.
- You can also display the thickness of the object at certain points or the overhang so that nothing can go wrong when printing.

Add shaders
With the "Shaders" function you can add color tones.
- For example, you can use it to transform a gray object into a shiny blue one. However, if you should only use Meshmixer to edit the object for later 3D printing, you usually do not need the function.

In the next practical tip, we will give you an introduction to the Solid Egde professional CAD program.