Minecraft LabyMod: installation and first steps
In this practical tip, we explain how you can install the LabyMod for Minecraft.
LabyMod: What does the mod bring?
The LabyMod offers numerous functions that significantly improve the game.
- If you go into a Minecraft world, if you press [Esc] you will discover new buttons in the top left corner. One of them is the "Chat" button. Here you can chat with your friends, even if they are not on the same server.
- With "Tags" you can give a player a nickname.
- In the settings you will now also find the "LabyMod Settings", in which you can set, among other things, that the ping to a server should be displayed or that the FPS should be shown.
Minecraft: Install LabyMod
First, make sure you have already started Minecraft and that Java is installed.
- Then go to the LabyMod homepage and download the LabyMod for your version.
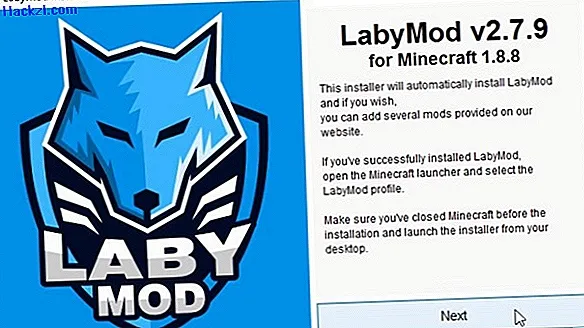
- Next run the downloaded JAR file and click "Next".
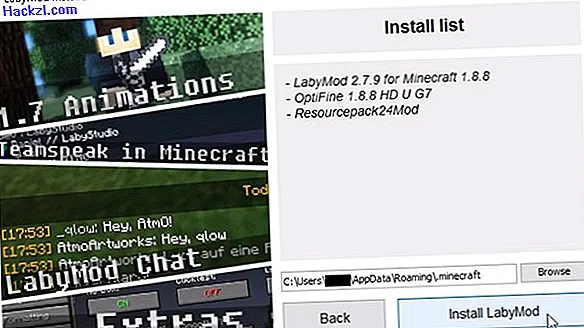
- Now you can choose which mods you want to install next to the LabyMod. Then click "Next" again.
- Finally, make sure that the Minecraft directory is automatically selected for installation and click on "Install LabyMod".
- In the Minecraft launcher you can now select the LabyMod version and start it.
- Tip: We also show you the installation steps in the picture gallery at the end of the article.

In the next practical tip, we will give you an introduction to Mod Thaumcraft.
Latest videos
Download the latest version of "LabyMod" and run the JAR file.
In addition to the LabyMod, you can also install other mods.

Make sure that the Minecraft directory has been selected as the installation location.