
Power supply: replace fan - how it works
If the fan rattles in the power supply of your computer or if it no longer rotates, this quickly damages the power supply or even the entire hardware. Replacing the fan is only advisable in very few cases and laypeople are strongly advised not to do so. For electrical professionals and voltage experts, we have summarized the individual installation steps here.
Attention: Only replace the fans in the power supply unit for professionals
First a warning: This guide is not intended for laypersons. Even after the power plug has been pulled and the voltage has been reduced using the on / off switch, the power supply can still be live. A strong electric shock cannot be ruled out if you accidentally touch conductive components during installation. Apart from that, the fan replacement in the power supply unit is only worthwhile in very few cases:
- Finding a suitable fan for the power supply is not easy, some manufacturers even install special sizes. In addition, the installation certainly takes 30 minutes. A new power supply is available from € 40 - depending on the wattage even cheaper.
- What you need to consider when buying a new power supply can be read in another practical tip. By the way: In our price comparison you will find the cheapest price for numerous power supplies - you can also arrange the hardware according to user popularity.
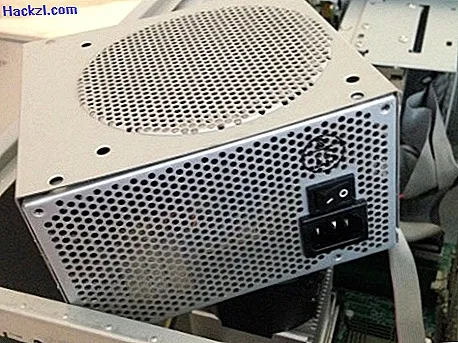
Step 1: Fan replacement - remove the power pack from the PC
When buying the new fan, make sure that it has the same performance. It's best to replace the broken fan with the same model.
- Turn off your computer and remove the power cord. Then press the on / off switch several times to remove the residual voltage. Attention: Part of the residual tension remains. So do not touch electronic components or the circuit board.
- Now take a Phillips screwdriver and remove the two screws on the back right to open the PC.
- Also remove all the screws that secure the power supply at the top. As a rule, you will not find more than four screws here.

Step 2: Fan replacement - open the power supply
- Once you have detached the power supply from the back wall and opened the PC, you can carefully lift it up. Please proceed carefully and note that there are sensitive plug connections at the other end of the cable.
- In most computers, the cables running out of the power supply are just long enough that you can lift the power supply and place it in the middle of the CPU fan. However, if you have more than two hands on site, you'd better hold the power supply in the air with your hands rather than putting it down. Dropping them may damage the rest of the hardware.
- There are several screws on the bottom of the power supply. Some screws can also be hidden on the sides of the power supply. If you loosen the screws, the power supply unit can be opened easily.
Step 3: Fan replacement - replace the fan from the power supply
- Disconnect the fan and find the end of the connected cables. If there is a plug connection here that can be easily disconnected, you can simply replace the fan here.
- In many cases, however, the connection is soldered. Loosen the connection with a soldering iron and then connect the new fan. If you have installed the fan, you can reassemble the computer in reverse order.
- If this way is also not possible, disconnect the fan with a side cutter. You can now connect the ends of the cables to the new fan. It is essential to isolate the connected cables with a shrink tube, as the power supply unit becomes very hot during operation.

Instructions at your own risk. CHIP-Online and the author assume no liability for damage to hardware or injuries.
In the next practical tip, we will show you how to properly clean your PC fan. We have put together the top power supplies in the price comparison for you here.