
Delete network shares in Windows 7 - how it works
Network shares can be easily deleted in Windows 7. This can be important in order not to allow third parties to access your data involuntarily. Simply follow these steps.
How to remove network shares on Windows 7
- Right-click on the folder whose network share you want to delete and select "Properties" from the context menu.
- Switch to the "Release" tab and click on the "Extended release ..." button in the middle.
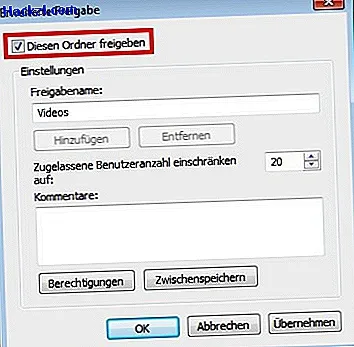
- In the new window, remove the checkmark in front of "Share this folder". Then click on "OK".
Delete network shares under Windows 7 Professional and Ultimate
In the Professional and Ultimate editions of Windows 7 there is another way to delete network shares.
- To do this, first open the start menu.
- Now right-click on the »Computer« menu item.
- Now select the second option from above - "Manage".
- The computer management will then open, in which you can also see all assigned network shares.
- Now click on “Shared Folders” in the menu on the left.
- Finally, select "Releases".
- In the window on the right-hand side you will now see a list of all released orders with their associated paths.
- The number in the "Number" column informs you how many users have access to the respective folder.
- Now right-click on the folder and select the "Unshare" command to delete a share in Windows 7.
- Warning: According to Microsoft, shares marked with a dollar sign should not be removed.
