
Setting up a network printer in Windows 7 - how it works
Related Videos: How to add a network printer using Windows 7 (April 2024).
If you want to use a printer with several computers, you can set it up as a network printer. You can find out how this works under Windows 7 in this practical tip.
Set up a network printer in Windows 7
- Click on the start button at the bottom left and select "Devices and Printers" from the start menu on the right.
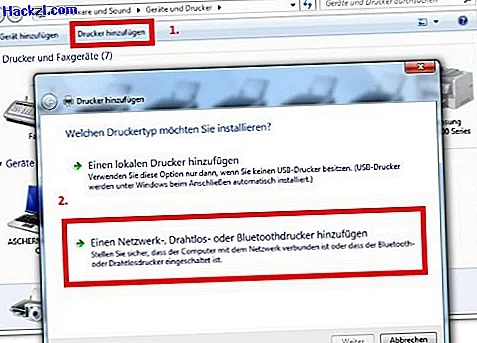
- Click on the "Add Printer" button above (see picture). Here you select the lower point "Add a network printer". Now all available printers in the network are searched for and displayed.
- When the printer is found, select it and click "Next" in the lower right corner.
- Give the printer a suitable name and click "Next" again.
- Now you can select the printer as the default printer. If you want to do this, check the appropriate point. Finally click on "Finish".
- If you experience problems while installing the network printer, follow the instructions in the following paragraph.
Common problems and their solutions
- If the printer cannot be found directly, read this practical tip on how to set up the printer manually.
- If your printer only has a USB port, which you use to connect the device to your computer, the availability on the network is severely limited. It can only be printed from another computer if the computer to which the printer is connected is also switched on.
- In order for the printer to be available on the network for other computers, it must be connected to the router using a network cable (see picture). This means that every computer on the network can access the printer.