
Address Nextcloud via WebDAV - how it works
WebDAV is a handy feature to access your Nextcloud files. In this practical tip, we will show you how you can access your cloud solution via WebDAV.
Windows: Address Nextcloud via WebDav
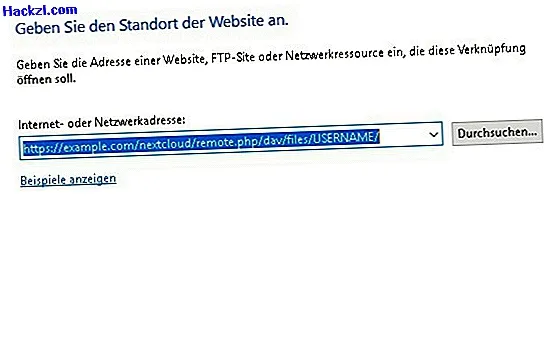
- To connect your Windows computer to Nextcloud, open Explorer, click on "This PC" and press "Add network address".
- Now press "Continue" until you are asked to enter a network address.
- Now enter the following into this field: "//yourdomain.de/nextcloud/remote.php/dav/files/Benutzername/". Replace "yourdomain.de" with the IP address or domain under which your Nextcloud server can be reached. You have to replace "username" with your own username.
- Then click "Next", enter your username and password and then press "Finish". Now you can access your files via WebDAV.
Establish a WebDAV connection to Nextcloud on Mac
- To establish a WebDAV connection to Nextcloud under OS X, open the Finder on your Mac, click on "Go" at the top and then on "Connect to server".
- Type in this URL here: "//yourdomain.de/nextcloud/remote.php/dav/files/Benutzername/". Replace "yourdomain.de" with the IP address or domain under which your Nextcloud server can be reached. You have to replace "username" with your own username.
- Click on "Next" and enter your login details. Now your Mac connects to the Nextcloud server via WebDAV.
In the next practical tip you will find a list of seven free Dropbox alternatives.