
Office 2010: Insert new font in Word
With a new font in Office 2010 you give Word documents an individual touch. You can insert the font in a few simple steps - we will show you how exactly.
1. Install the font on the PC
Before you can give your Word documents a certain twist with new fonts, you first need the appropriate fonts. Here we have put together 50 extraordinary fonts that you can also use in Office 2010.
- After you have downloaded a fonts package, you must add it to the fonts folder on your PC. You can then use them in Word, Excel, Powerpoint or any other software.
- The fonts folder can be found under this path: C: \ Windows \ Fonts. To get your new fonts there, you have several options. We present two simple solutions in the following paragraph.

2. Move the new font into the Fonts folder
- Right-click on the Windows start icon and select "Open Windows Explorer".
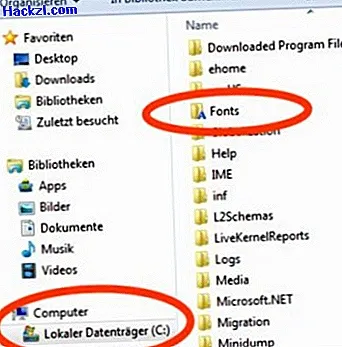
- In Windows Explorer, first select the directory in which the Windows operating system was installed under "Computer" on the left-hand side. In most cases this is "C".
- Then select the "Windows"> "Fonts" folder on the right.
- Now simply drag the new font into the "Fonts" folder. Alternatively, this works with Copy & Paste (right click> "Copy" / "Paste").
- If you call up a Word document now, you will find the newly added fonts under "Fonts".
Tip: Extract the font into the fonts folder
Even easier: If you have a font package that still needs to be extracted, enter the path "C: \ Windows \ Fonts" as the destination for the extracted files. If you no longer need to extract the new fonts or have received an error message, follow the instructions above.
Here's how to create chic invitations with your new fonts.