
OpenOffice Writer: Insert or delete table row
In a table in the OpenOffice Writer you can easily insert or delete another row. We explain how this works in this practical tip.
Insert table row under OpenOffice Writer
- In your table, click the row next to which you want to insert another cell.
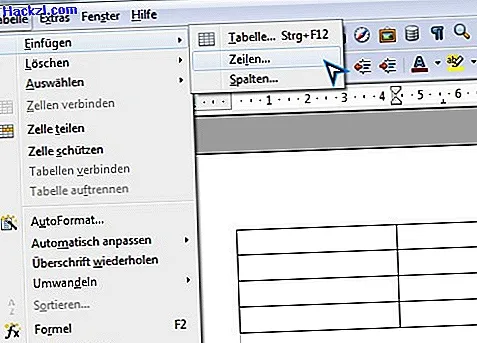
- Select the "Table" tab and move the mouse over the "Insert" option. Then click on the "Rows ..." entry.
- Now define the number of lines and determine whether these should be inserted before or after your selected line.
- Finally confirm your entry with "OK".
Remove row in an OpenOffice table
- Click the row in your table that you want to delete.
- Move your mouse over the "Line" option in the context menu.
- Another menu appears in which you select the "Delete" option.

In the next article we will show you how you can insert page numbers into your Open Office documents. These instructions refer to OpenOffice Writer 4.1.