OpenOffice: Create a timeline - how it works
In this guide, we explain step by step how to create a timeline in OpenOffice.
Create timeline in OpenOffice Draw
You can insert a timeline in OpenOffice Draw and then in OpenOffice Writer:
- Open a new page in OpenOffice Draw.
- Then click the arrow button and drag a long arrow from left to right in the document.
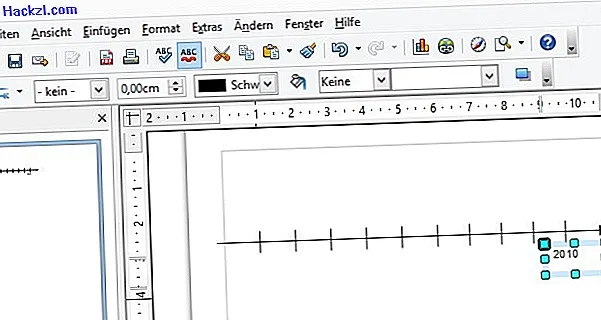
- Next, you need to insert individual sections on your timeline. This works with the line button.
- First insert a line on the timeline and then copy it with the key combination [Ctrl] + [C].
- With [Ctrl] + [V] you can insert the line as often as you like and position it exactly with the arrow keys.
- With the button "T" you can optionally add a text, for example years for the sections on the timeline.
- You can now save the finished timeline as a PNG file via "File"> "Export".
- In OpenOffice Writer, click "Insert"> "Image"> "From file" and select the timeline you just created.