
Set up OpenVPN on the Raspberry Pi - how it works
Related Videos: PiVPN : How to Run a VPN Server on a $35 Raspberry Pi! (May 2024).
In this practical tip you will learn how you can also use OpenVPN on your Raspberry Pi so that you can easily establish an encrypted connection to a VPN server with your Raspberry Pi.
Raspberry Pi with OpenVPN: Update Raspbian
So that no errors occur later, it is advisable to update Raspbian to the latest version. To do this, run the following command (without the quotation marks):
- "sudo apt-get update && sudo apt-get upgrade"

Edit network configuration
The first thing to do is to start editing your network configuration.
- "sudo nano / etc / network / interfaces"
- If the line "iface eth0 inet manual" is present, you have to comment it out.
- Your configuration should now look something like this: "# IPv4 address iface eth0 inet static address 192.168.x.xxx netmask 255.255.xxx.x network 192.168.xx broadcast 192.168.x.xxx gateway 192.168.xx" Simply adapt it to your personal Conditions.
- Save the changes with [Ctrl] + [X] + [Y] and start the network service again: "sudo systemctl restart networking.service".
- If you want, you can check the new configuration again with "ifconfig".

Install and set up OpenVPN
Now you can start with the actual installation of OpenVPN on the Raspberry Pi.
- First install OpenVPN with the following command: "sudo apt-get install openvpn && sudo apt-get install openssl"
- Move the OpenVPN certificates "ca.crt", "server.crt", "server.key", "tlsauth.key" and "dh4096.pem" into the directory "/ etc / openvpn / easy-rsa / keys / ". You can find the certificates on your PC at "C: \ Program Files \ OpenVPN \ config". If you are not yet using OpenVPN on the PC and therefore do not yet have the certificates, read on in this practical tip.
- Reset the permissions for the certificates: "sudo chown -R root: root / etc / openvpn / easy-rsa / keys /" & "sudo find / etc / openvpn / easy-rsa / keys / -type f -exec chmod 400 {} \; "
Edit the server configuration file
To be able to use the OpenVPN server correctly, you have to edit the OpenVPN server configuration file.
- Run the "sudo nano /etc/openvpn/server.conf" command to open the configuration file.
- This should look something like this for you: "dev do proto udp port 1194 status /var/log/openvpn-status.log log /var/log/openvpn.log verb 3 persist-do persist-key ca / etc / openvpn / easy -rsa / keys / ca.crt cert /etc/openvpn/easy-rsa/keys/server.crt key /etc/openvpn/easy-rsa/keys/server.key dh / etc / openvpn / easy-rsa / keys / dh4096.pem tls-auth /etc/openvpn/easy-rsa/keys/tlsauth.key 0 cipher AES-256-CBC auth SHA512 keepalive 10 120 tls-cipher TLS-DHE-RSA-WITH-AES-256-GCM-SHA384 : TLS DHE-RSA-WITH-AES-256-CBC-SHA256: TLS DHE-RSA-WITH-AES-128-GCM SHA256: TLS DHE-RSA-WITH-AES-128-CBC-SHA256: TLS -DHE-RSA-WITH-AES-256-CBC-SHA server 10.199.10.0 255.255.255.0 tls-server tls-version-min 1.2 auth-nocache duplicate-cn push "redirect-gateway def1" push "dhcp-option DNS 208.67 .220.220 "push" dhcp option DNS 208.67.222.222 "push" block-outside-dns ""
- Adjust them to suit your needs and save them with [Ctrl] + [X] + [Y].
- Finally, reset the permissions: "sudo chmod 600 /etc/openvpn/server.conf"

Start the OpenVPN server
Now the time has finally come and you can start the OpenVPN server.
- First activate it with "sudo systemctl enable openvpn.service", and then start it with "sudo systemctl start openvpn.service".
Configure routing
With this step you provide access to internal network resources and Internet access.
- Use the command "sudo nano /etc/sysctl.conf" to open the sysctl configuration file and comment out the line "net.ipv4.ip_forward = 1".
- Save the configuration and execute the command "sudo sysctl -p".
Edit Raspberry Pi firewall
Finally, you have to edit the firewall of the Raspberry Pi so that OpenVPN works properly.
$config[ads_text5] not found- First install a small tool to save the firewall settings permanently: "sudo apt-get install iptables-persistent"
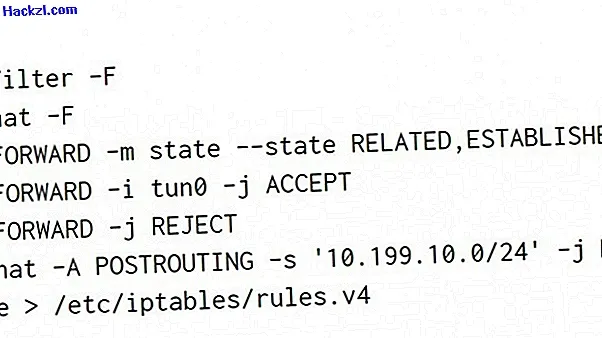
- The rules are written in a shell script, which you can call up with "sudo nano /usr/local/bin/iptables.sh".
- The script should look something like this: "#! / Bin / bash iptables -t filter -F iptables -t nat -F iptables -A FORWARD -m state --state RELATED, ESTABLISHED -j ACCEPT iptables -A FORWARD -i tun0 -j ACCEPT iptables -A FORWARD -j REJECT iptables -t nat -A POSTROUTING -s '10 .199.10.0 / 24 '-j MASQUERADE iptables-save> /etc/iptables/rules.v4 "
- Finally, mark the script as executable and start it: "sudo chmod + x /usr/local/bin/iptables.sh && sudo sh /usr/local/bin/iptables.sh"
We will show you the five best alternatives to OpenVPN in the next practical tip.