
Paint.NET: The most important functions for beginners
Related Videos: Beginner's Guide to Paint.NET | The Basics (May 2024).
As a popular and free graphics program, Paint.NET offers important functions to edit images quickly and easily. So that you can start quickly, we explain the most important functions for beginners in this practical tip.
Use the main tools in Paint.NET
The most important tools for Paint.NET can be found in a separate window on the left after the program starts. If you click on one of the functions, a second toolbar appears at the top of the main window, in which you can find setting options for the selected tools.
- You can use the selection functions (rectangular mask, elliptical mask, lasso) to select an area in the image.
- You can use the "Move selection" tool to move the selection (which you made with the selection functions) to a different position.
- Use the "Paint Bucket" tool to fill an area with paint. You can also restrict this area by using the selection functions.
- With the "Brush" or "Pencil" tool you can paint like on a sheet of paper. If you have previously selected an image area, the drawing tool only works within this limitation. You can also use the "Tool" toolbar to select the thickness of the brush.
- With the "Text" tool you can create and write a text field on your image. You can also find numerous customization options in the toolbar at the top.
- With the lowest tools you can create shapes in your picture (ellipse, rectangle, free form).

Choose colors and use layers in Paint.NET
You will need the color picker for some of the above functions. You should also manage several processing levels for better clarity. Fortunately, these two components of Paint.NET are also very easy to use.
- You can easily select a color using the color picker. The basic colors are already suggested below.
- With a left click you select a primary color. With a right click you determine the secondary color. Both colors are used for some functions. You can also switch between primary and secondary color in the selection box above.
- After clicking on "More >>>" additional functions appear, such as entering HTML codes.
- The other external window is the Layers Toolbox. You can add a new level using the button at the bottom left.
- You always work at the level you have just selected. The other levels are not changed. So that elements on one level cover the other, you can sort them using the buttons with the arrows.

Edit photos: corrections and effects
Paint.NET is often used as an editing program for photos.
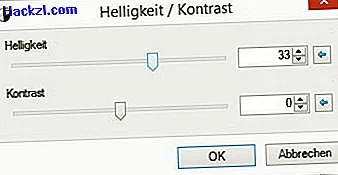
- Via the menu you can reach the point "corrections". Here you can change properties such as brightness, contrast or color saturation using the controller or manually using the color curve. Here, too, the effect only applies to the selected level and the selection made. You can examine the effects directly in the picture.
- Effects usually change the picture even more. For example, you can use the Gaussian blur to blur parts of the image, remove annoying red eyes from photos, or display the image as a pencil drawing. Paint.NET does not offer quite as many effects as Gimp.
Paint.NET is available in our download area as a free download. You can work more professionally and extensively with the free image editing Gimp.
Read how to create your own cartoon in this practical tip.