Paint.net: Highlight the object in the image in color
If you want to focus on a specific object in the image in Paint.net, you can highlight it with a color. This practical tip helps you with image editing.
First: cut out the object from the picture
You can find detailed instructions for cropping objects in pictures in another practical tip. In the following only the rough steps. In our picture gallery you can follow the steps again using an example.
- Mark the object you want to highlight generously with the "Rectangular Mask" and copy it.
- Create a new layer under "File" -> "New ..." and insert the picture.
- Use the eraser to carefully remove the remnants of the edge until only your object is left.
- Now mark the object again with the "Rectangular Mask" and copy it.
- Click on your original image in the image selection at the top right.
- Now select under "Edit" -> "Paste into new layer" and place the object again at the actual position.

The finishing touch: highlight the object in the image
You can now highlight the object according to your ideas. Depending on the motif, you have to adjust the specified values.
- Press [F7] to display the levels.
- Select the lower layer - your background - and add the "black and white" effect to "corrections".
- Now select the layer with your object and click on "Corrections" -> "Hue / Saturation".
- Increase the control from "Saturation" to the value 115 and the "Brightness" to 6.
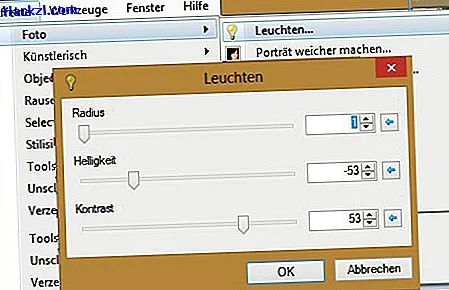
- Add the "Glow" effect under "Effects" -> "Photo".
- Set the "Radius" to 2, the "Brightness" to -53 and the Contrast to 53.
- Depending on your preference, you can add various other effects or experiment with the effects.
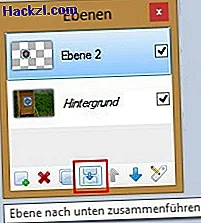
- When you have finished editing your picture, finally merge the layers under "Layers" -> "Merge Layer Down".
If you would like to round off the corners with Paint.net in your finished picture, the next practical tip will help you.
Latest videos
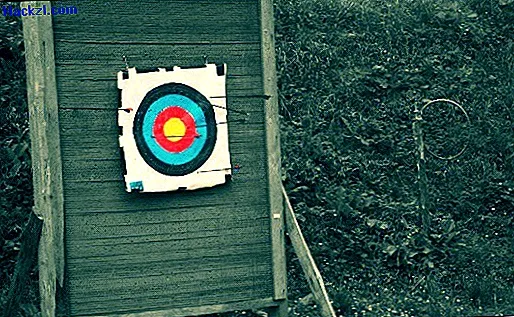
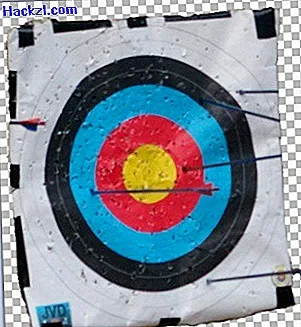
Select the object you want to highlight.
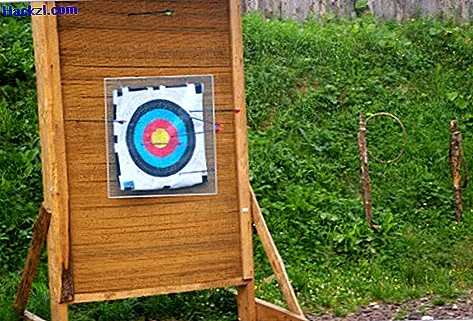
Mark the finished object and insert it back into the original image.
Use the "black and white" effect on the background.

Make your object more vivid with "Hue / Saturation".

The "glow" effect increases the luminosity of the colors.
Put the two levels together and don't forget to save.