Photoshop: Create a comic effect
Related Videos: How to Turn Photos into Cartoon Effect - Photoshop Tutorial (May 2024).
With Photoshop you can recreate the comic effect without additional tools - we will show you step by step how it works.
Create a comic effect with filters in Photoshop
With this step-by-step guide, you can create beautiful comics from your own photos. We'll show you how to use Photoshop to bring the comic effect to your photos.
- First of all, you have to open your desired photo in Photoshop. Duplicate the layer.
- Place the Filter> Blur Filter> Make Matter on the duplicated layer. Try the settings a little: radius about 5 pixels, threshold about 15-20 levels.
- Duplicate this layer again. Then set the saturation to -100. If the saturation affects all levels, right-click> "Reduce to a level with the one below".
- Place an empty layer on top of it. Select the "Channels" tab and click on the RGB channel while holding down the [Ctrl] or [cmd] key. Then select Selection> Invert Selection from the program bar.
- Select [Shift] + [Return] at the same time to fill the area with the color black. Hide the grayscale layer to see the color. Place a filter> filter gallery> art filter> color paper collage with the values number of levels 3, level of abstraction 0, implementation accuracy 3 on the matt level.
- Duplicate the layer and select the Soft Light layer effect. At the grayscale level, choose Filters> Filter Gallery> Tone Separation & Edge Emphasis for comic-like edges.
- Select the top halftone layer. Shift-click on the layer and create a layer mask by clicking on the mask icon in the layer window. Place the filter> Coarsening filter> Color grid on it.
Another great effect is the sepia and vintage effect, which we explain to you in another practical tip.
Latest videos
Open your photo in Photoshop and duplicate the layer by right-clicking> Duplicate Layer.
Duplicate layer. ">Duplicate level. "/>
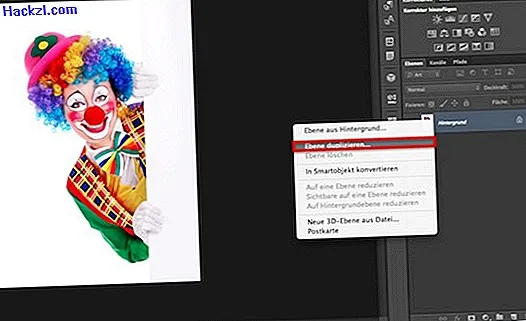
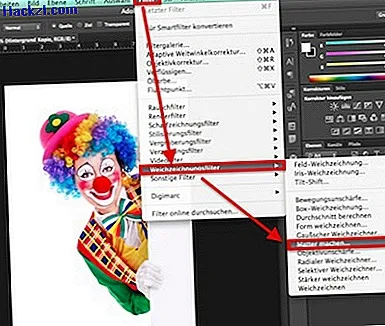
Then place the Filter> Blur Filter> Matter on this level. Here you can try out the settings yourself. We recommend a radius of 5 pixels and a threshold of 15-20 levels.
Softening Filters> Matter. Here you can try out the settings yourself. We recommend a radius of 5 pixels and a threshold of 15-20 levels. ">Softening Filters> Matter. Here you can try out the settings yourself. We recommend a radius of 5 pixels and a threshold of 15-20 levels. "/>
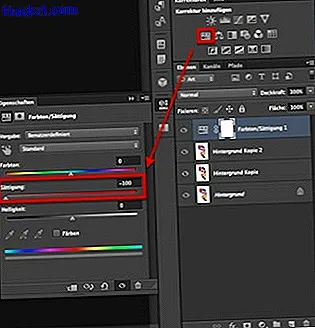
Then duplicate this layer and set the saturation to -100. This gives you a layer in grayscale. Right-click> "Reduce to a level with the one below", the saturation only affects this level.
"Reduce to a level with the one below", the saturation only affects this level. ">"Reduce to a level with the one below", the saturation only affects this level. "/>
An empty layer is placed on top of it. Select this empty layer and open channels. While holding down the [Ctrl] or [cmd] key, click on the RGB channel. Then click on Selection> Invert Selection.
Invert selection. ">Invert selection. "/>
Press [Shift] and the [Return] key at the same time. A dialog window for "fill area" opens. Select "Color" there and set it to black. Confirm with OK. Your photo will now have darker areas in the picture.
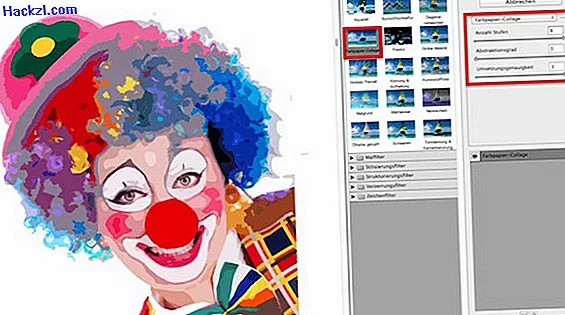
First hide the grayscale layer so that you can see the effects better. Select the matt colored layer and put the filter> filter gallery> art filter> color paper collage on it. Set the following values: number of levels 3, level of abstraction 0, implementation accuracy 3.
Filter gallery> Art filters> Color paper collage. Set the following values: Number of levels 3, level of abstraction 0, implementation accuracy 3. ">Filter gallery> Art filters> Color paper collage. Set the following values: Number of levels 3, level of abstraction 0, implementation accuracy 3. "/>
Duplicate this layer again and set the layer effect to "Soft Light". For realistic comic-effect edges, select the grayscale level and create the filter> Filter gallery> Sound separation & edge enhancement. Set all values there to 1. Set this grayscale level to the effect "light point".
Filter gallery> Sound separation & edge enhancement. Set all values there to 1. Set this grayscale layer to the effect "light point". ">Filter gallery> Sound separation & edge enhancement. Set all values there to 1. Set this grayscale layer to the effect "light point". "/>

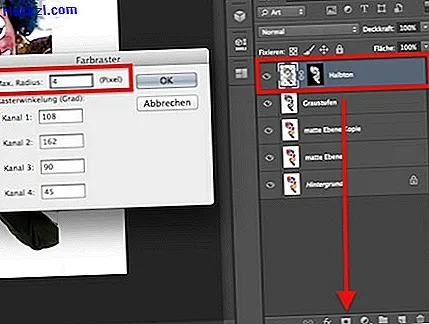
Now create a layer mask with the top halftone layer by clicking on the layer while holding down the [Shift] key and then on the small square with the cut circle in the lower left in the layer options. Now select the left thumbnail of the layer and create the filter> Coarsening filter> Color grid.
Coarse filter> Color grid on. ">Coarse filter> Color grid on. "/>
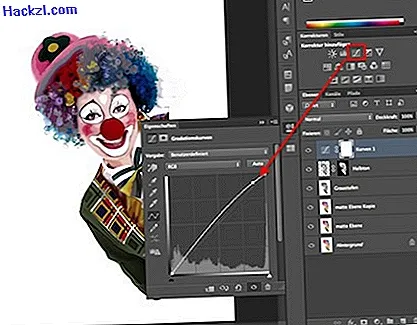
Your comic effect is ready. If you wish, you can lighten the graphic a little with a gradation curve.