Photoshop Elements: crop images - so it'll work
In this photo editing tip, we explain how you can crop objects with the photo editing software "Photoshop Elements".
Cropping images with Photoshop Elements
With the numerous tools in the image processing program "Photoshop Elements" you can, like the big brother "Photoshop CS6", selectively cut out individual image objects and use them for further processing.
- Start "Photoshop Elements" and open your original image.
- Use the "Quick Selection Tool" on the left side of the vertical toolbar. Carefully move the left mouse button over the area of the image that you want to crop. Your selection is marked in a black and white frame. Reduce the size of your tool so that you can work as detailed as possible. If you hold down the "Alt key", you can exclude image areas from your selection if necessary.
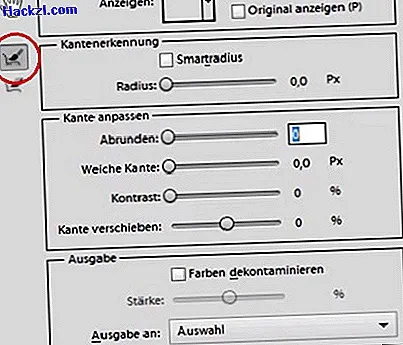
- Then click on the "Improve edge" button to the right of the tool size setting to integrate small image areas into your selection. This professional image editing mode is particularly useful when you want to crop very detailed objects with fine transparencies, such as a tree top. A new window opens (see screenshot).
- Use the little black arrow next to your ad to set the "Overlay" option. The background of your photo is highlighted in color and you can see the finer details in this way. Now just zoom a bit with "Ctrl" and "+" into your picture selection and drive with the left mouse button pressed over the problem areas. As soon as you let go, the individual details are added to your desired selection. Repeat this process until you are satisfied with the result.
- Finally, confirm your setting and save your finished isolated image.