
Photoshop: exchange faces - how it works
Related Videos: Swap Faces In Photoshop (May 2024).
Photoshop has some tools that you can use to change faces and also to exchange them. We'll show you how it works.
1. Photoshop: Select faces to swap them
Before you start working, you should first select suitable faces that you want to exchange. Note that the pictures should not differ too much in size. It is also a great advantage if the color of the two faces is similar. A big color difference means more work.
- Open images: If you have found suitable images, open them with Photoshop. Navigate to "File" -> "Open". Select the images and click "Open".
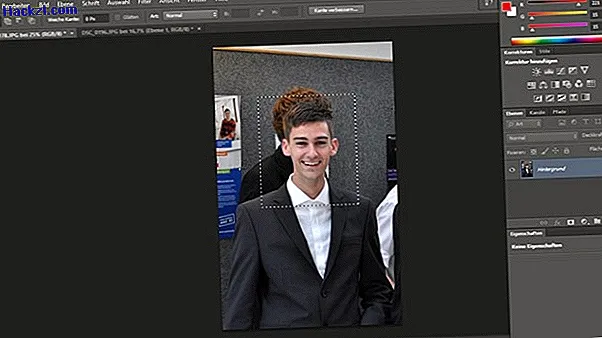
- Copy face: With the selection rectangle tool you can mark an area of the image that you want to copy. This section is primarily limited to the person's face. Then go to "Edit" -> "Copy".
- Insert section: Switch to the other open picture on which you want to exchange faces. Press the key combination [Ctrl] + [V] to paste the copied section.
2. Position images in Photoshop
The added section should be positioned so that the two faces lie on one another as precisely as possible. Here Photoshop offers some functions with which you can move pictures. Note that the inserted picture is positioned and not the background picture. Make sure that you have selected the layer accordingly and not the background image.
- Position Image: Photoshop has a move tool that you can use to move images. If you want to change the image size, press the key combination [Ctrl] + [T]. You can also rotate the image.
- Reduce opacity: You will notice that you cannot position the image so precisely that both faces lie directly on top of each other. To make the underlying layer more visible, decrease the opacity of the added image. Double-click on the layer to open the "Layer Style" window. Under Opacity you set the value 50%. Click OK".
- Increase opacity: When you have moved and rotated the image in the right place, open the "Layer style" window again. You can shift the opacity back to 100%. Click OK".

3. Swap faces in Photoshop
Once you have put both faces in the right position, it is time to get down to business. The inserted face should replace the one underneath.
- Select area: Go back to the selection rectangle tool. Drag a frame around the added layer. Click on "Edit" -> "Copy". Delete the layer above the background picture. Go back to your original image and paste the copy with [Ctrl] + [V].
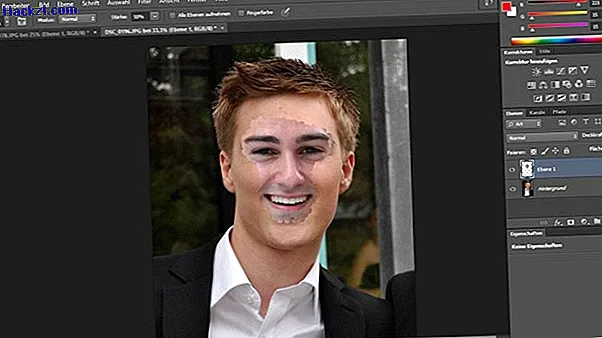
- Copy stamp: Click on the copy stamp. You will get a circle, the size of which you can vary above. Drag the circle to the left eye of the copy and press [Alt]. Click on the eye to copy part of the eye.
- Paint over face: Now navigate to the picture you want to paint over. Go to "Layer" on the top bar of Photoshop. Click on "New" and then select "Layer ...". Make sure that the copy stamp is selected. Place the copy stamp on the left eye of the image. Hold down the mouse button and move the copy stamp over the face that is to be replaced.
4. Photoshop: adjust colors
If the color differences are not too big, it is no problem to adjust the colors. Here, too, Photoshop offers some tools that you can use to adjust the colors of the two images.
- Hue / Saturation: Navigate to "Image" -> "Corrections" -> "Hue / Saturation" or press the key combination [Ctrl] + [U]. A window opens in which you can adjust the hue, saturation and brightness. Play around with the values to get the best result.
- Smudge: The wiper finger tool can be an efficient tool if used in moderation. The rule here is that less is often more. Blur the smallest color differences and create a smooth transition.
