Photoshop: set up graphics tablet - how it works
If you want to draw professionally in Photoshop with your graphics tablet, you first need to set up the tablet in Photoshop. In this practical tip, we will show you how to best do this.
Use graphics tablet in Photoshop
Before you can use your graphics tablet in Photoshop, you have to install the appropriate drivers from the hardware manufacturer on your PC or Mac. Observe the operating instructions for your graphics tablet.
- Using the manufacturer's software, you can also make settings on your graphics tablet - such as the key assignment or the pressure sensitivity of the pen.
- The options for the settings differ depending on the manufacturer and graphics tablet.
- Only when your graphics tablet is fully set up can you use it in Photoshop.
Adjust brush settings in Photoshop
After you have successfully connected your graphics tablet to the PC, you can open Photoshop. In Photoshop there is unfortunately no central menu for pen settings - these differ depending on the brush selected. To adapt a brush to your graphics tablet, proceed as follows:
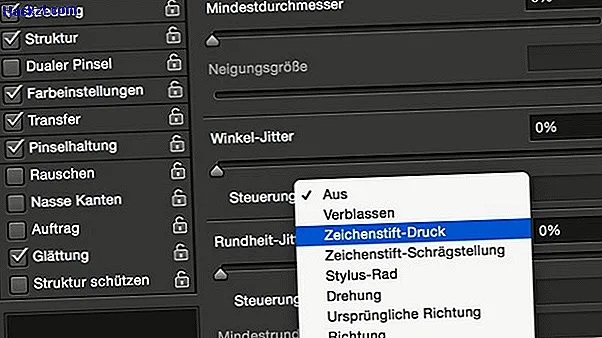
- Select the drawing tool in Photoshop. In the menu bar above you will find two buttons next to the setting for the opacity, with which you can let the pressure of your pen affect the size of the brush (right button) and / or the opacity of the line (left button).
- In addition, you can activate special settings for the graphics tablet in the properties of each brush. For example, you can set a spread depending on the brush tilt or color deviation depending on the print.
- In order to find the best results for the brushes, it only takes a lot of time and lots of trial and error - the needs and requirements vary depending on the user.