Photoshop: Create contour - there are these options
As is well known, many paths lead to Rome - and some in Photoshop to the contour. We show you the different options.
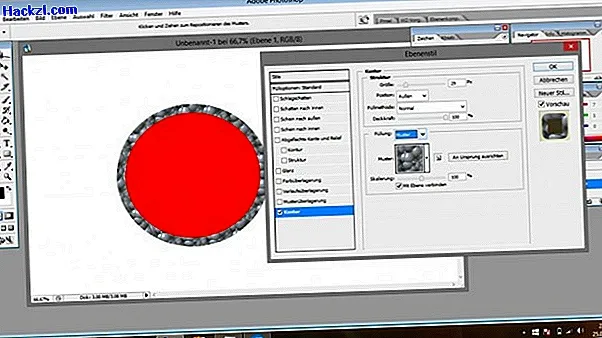
Contour over layer style
If you want to add an outline to an object, a path via the layer styles leads to the desired result.
- In the "Layers" menu, navigate to "Layer Styles -> Contour".
- In addition to the thickness of the contour, you can also set the color and position here.
- In contrast to the following, this path to the contour offers another option: You can decide whether the contour should simply be colored or whether it should have a color gradient or pattern.

Contour via "fill contour"
If you just want a contour for the object - without further setting options - another way is faster.
- Under the "Edit" menu you will find a "Fill contour" item.
- You can also use this method to determine thickness, color and position, but not a blending method.
A bit awkward - the selection tool
There is another way to assign a contour to an object. It is somewhat cumbersome, but we would like to mention it for the sake of completeness.
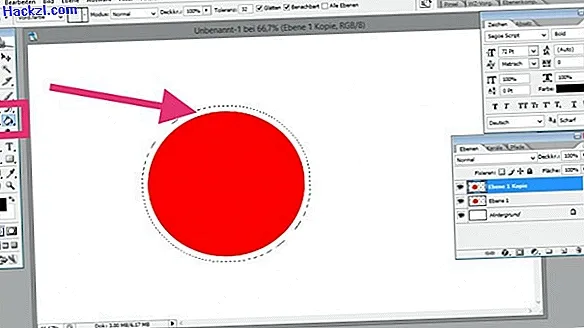
- Select the object with a selection tool, for example the magic wand.
- Via the menu "Selection -> Change selection -> Enlarge selection" you can expand the selection by the number of pixels that corresponds to the thickness of the desired contour.
- Next select the fill tool and click in the area of the extended selection. As a result, you also get a contour.
Latest videos
Simple contour over layer style.

Alternatively, the contour can also be filled with a gradient or pattern.

It's quicker with "Fill contour"

Cumbersome, but also a way: expanding and filling the selection.