Photoshop: Create a mockup - how it works
Free and paid mockups can be found on the Internet on numerous pages. You can use Photoshop just as well to create your own mockups. We show you how this works in this practical tip.
Create mockups with Photoshop - Here's how
Mockups you create yourself have considerable advantages: on the one hand, they fit your project perfectly, and on the other hand, you can be sure that nobody else is using the same image. Read below how to create a mockup. See also our illustrated instructions below.
- For your own mockup, of course, you have to take a picture first. Depending on your needs, the motif can be a smartphone, television or laptop.
- Then open the shot in Photoshop.
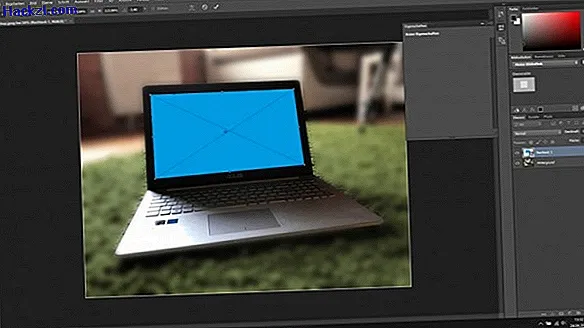
- Next, create a rectangle using the toolbar on the left. This should roughly cover the area you want to replace later.
- Right-click on the created rectangle in the layer menu and select "Convert to Smart Object".
- Now navigate to "Edit" -> "Transform" -> "Distort". With the selected tool, you push the corners of the rectangle onto the corner points of the area to be replaced (eg a laptop display).
Photoshop: Put the picture in your own mockup
Once you have created the template, you can easily insert any image for the area of the rectangle:
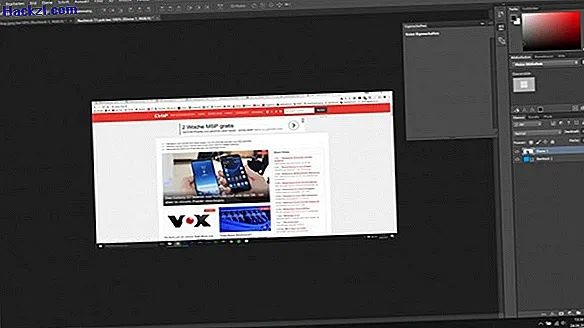
- To do this, double-click on the rectangle level so that it opens in a new tab.
- Now you can insert any picture. For example a screenshot of your project.
- Save and return to the first file. You will now see that the rectangle has turned into your picture.
In the next practical tip, we will show you how to make the background of an image transparent in Photoshop.
Latest videos
Open your image in Photoshop.

Use the toolbar on the left to create a rectangle.

Right-click the rectangle in the layer menu and select "Convert to Smart Object".

Navigate to "Edit" -> "Transform" -> "Distort".
"Transform" -> "Distort". ">"Transform" -> "Distort". "/>

Now push the corner points of the rectangle onto those of the display.
Open the rectangle level with a double click and insert an image. Then don't forget to save the changes.