Photoshop: Create fog - how it works
Adding some fog to an image with Photoshop can quickly make it much more impressive. In this article and our picture gallery, we will show you exactly how to create the fog.
Create Photoshop Nebula with a brush
The easiest solution in Photshop is to "paint" the fog:
- Create a new layer and choose a fairly large brush with the color white and a hardness of 0%.
- In the "Window" menu item you will find the "Brush" settings window. Open this up.
- Increase the spread slightly in the menu depending on the image size. If necessary, the "number" and the "number jitter" can be adjusted.
- At your new level you can now paint your fog with the brush and an opacity of approx. 50%.
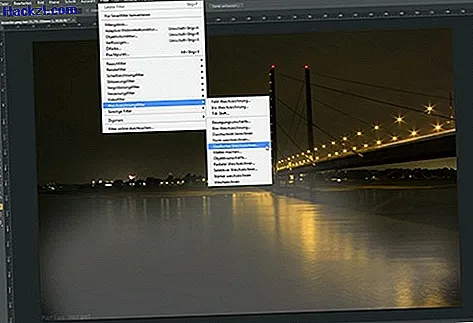
- Then go to "Filters"> "Blur Filters" and activate the "Gaussian Blur".
- This makes your fog look softer and more realistic. Adjust the radius depending on the picture.
- Finally, you can lower the opacity of the layer until the fog looks more lifelike.

- The individual steps can also be found in our picture gallery.
Mist with structure
If the first method is not enough for you and you would rather have a haze, you can also use the cloud filter:
- Choose black and white as colors.
- Then open the "Render Filter" menu in Filter and have a "Cloud" structure displayed on a new level.
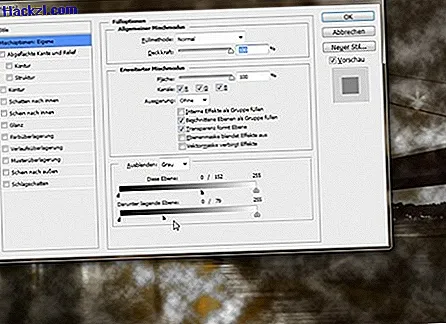
- Now right-click on the level in the "Fill Options".
- In the mixing options (first menu item), select "Gray" as the color to be hidden in the last third.
- Now hold down the [ALT] key and adjust both controls so that only light white clouds remain.
- Confirm the fill options and reapply the "Gaussian Blur" in "Blur Filter".
- Finally, you can adjust the fog to the opacity of the layer and a layer mask.

Our Photoshop tip: Try the 8-bit effect.
Latest videos
The right brush for creating fog.

The brush menu can be found via the window menu or with the shortcut F5.

The brush window offers you many options. In this tip, however, you should only use the "scatter".

The interim result is still unnatural. The "Gaussian soft focus" will help you.
The cloud level fill options will help you render out the black portion.