Photoshop: Create text with a glass effect
Related Videos: How to Make Glass Effect in Photoshop (May 2024).
In this practical tip, we will show you how to use Photoshop to create text in a glass effect.
Create a glass effect with Photoshop
In the following steps we will show you how to create a realistic glass effect with Photoshop.
- Start "Photoshop" and open your desired image.
- Then use the text tool in the left vertical toolbar to draw a text field on your image and write the desired text into it. You can use the key combination Ctrl + T to mark the text field and, while holding down the Shift key, enlarge it as required over the corner points.
- After entering the text, double-click on the text level to open the filling options. Set the opacity to about "10" and the size to "32" (see screenshot) under the heading "Shine outwards".
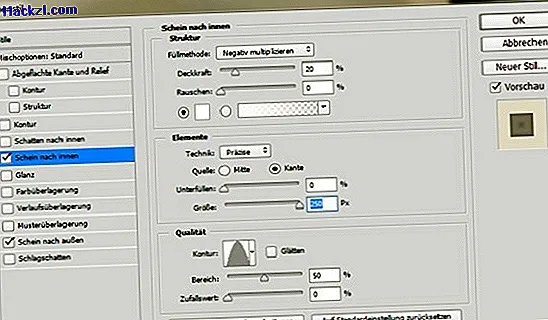
- Then set the opacity to about "20", the color to "White", the technique to "Precise", with underfilling to "0 percent" and the size to "100 percent" under the "Glow inwards" option. In this editing window, change the contour in terms of quality (step 1).
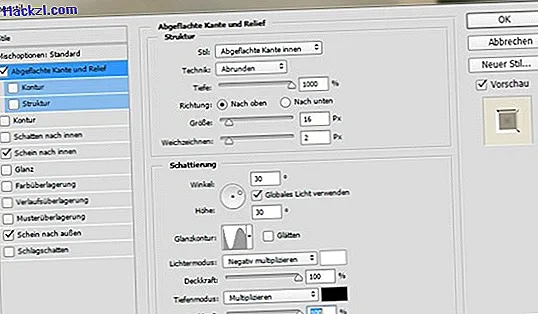
- Next, you have to set the depth to 1000 percent, the size to about 16 pixels and a slight degree to "Blur" under the image processing point "Flattened edge and relief" under "Structure" (step 2).
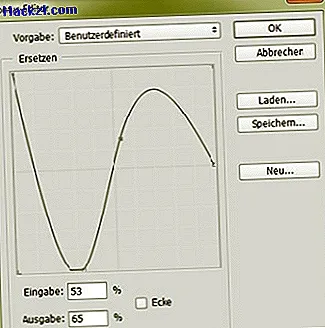
- For a detailed glass effect you have to create your own contour under "Shading" by changing the line (see step 3). Save your finished contour and then load it.
- Finally, turn the opacity to 100 percent in this window. Then close the Layer Style window.
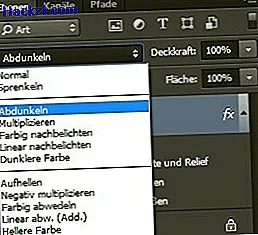
- As a final step, you now have to darken the inside of your text at "Normal" (step 4).
- Tip: Under "Filters", "Distortion Filters" and "Vibrations" you can add natural-looking distortions to your glass effect.

Latest videos
Step 1: Set Layer Style Options for "Glow Inside".
Step 2: Set options under "Flattened Edge and Relief".
Step 3: create your own glass contour.
Step 4: Darken the "lettering".