
Photoshop: before and after view - how it works
You can use the Before and After view to see the changes you've made in Photoshop. This practical tip shows you how to activate this view.
Activate before and after view in Photoshop - so it'll work
- Start Photoshop and paste the image you want to edit.
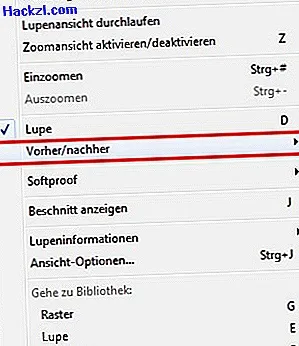
- Then choose "View"> "Before / After" (see screenshot). There you can then choose how the view should be displayed.
- To be able to display the changes side by side, select "Left / Right".
- You will then see the picture next to each other, on the right side all changes are shown.
In the next practical tip, read how you can blur the background in Photoshop.